Do you want to edit your rental settings directly in Rategenie? With the Rental Settings feature, you can make updates to your rental settings without having to go back to your channel manager.
Click the rental name
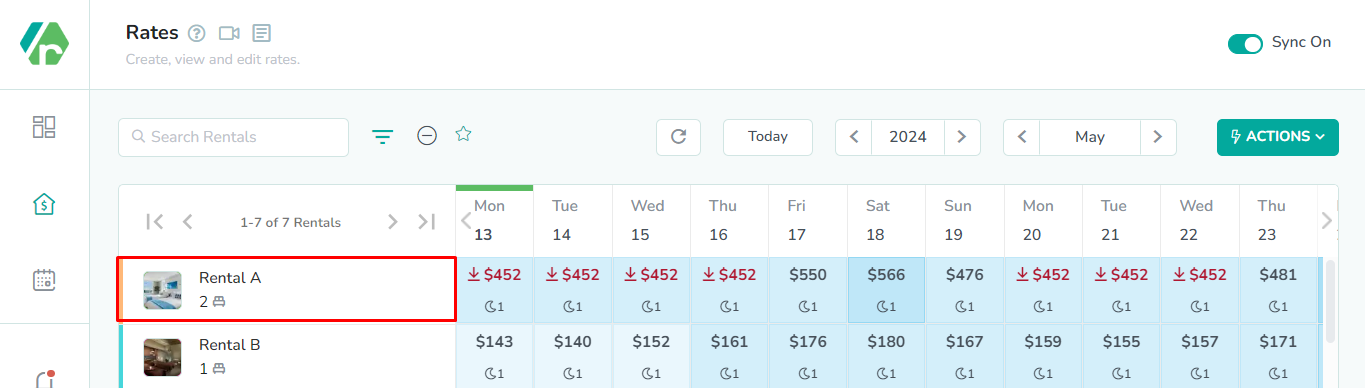
The Rental is located in the left-most column of the rates calendar. Click here to open the rental rates overlay.
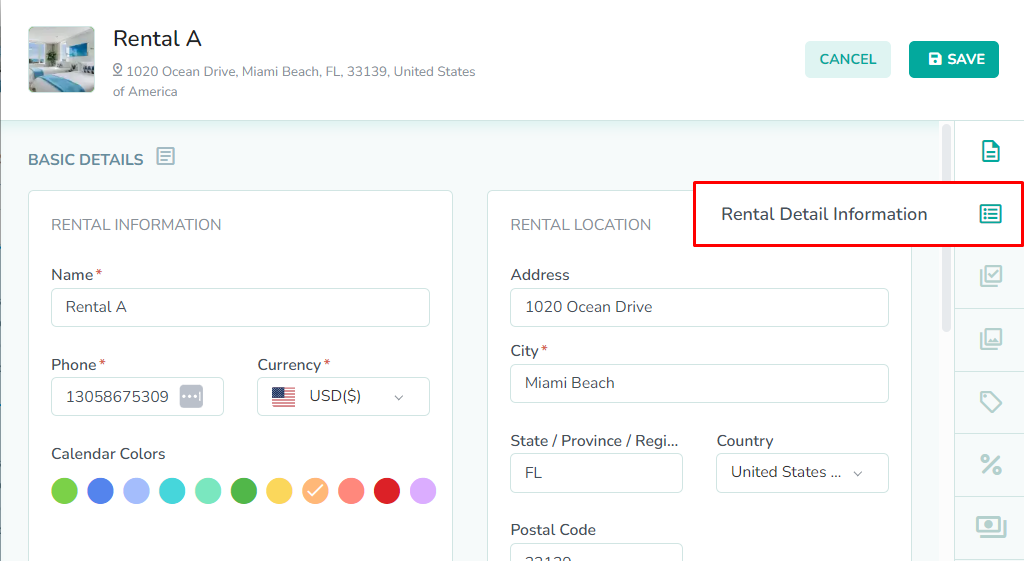
Click the Details button

The Details button is the second button at the top of the rental rates overlay. Click here to open the rental settings overlay.
Review the basic details

The rental settings overlay opens up to the Basic Details tab. This tab contains the rental information and rental location. Rental information contains the name, phone number, currency, and rental color fields. Rental location contains the address, city, state, country, and postal code fields.
When editing the rental location, we strongly recommend using the search results that appear when you type in the street address. This will allow the GPS coordinates to be accurately displayed on the map. The GPS location is used to gather market data for the rental. You can enter an alternate location later, if you wish to use market data from a different location.Review the rental detail information
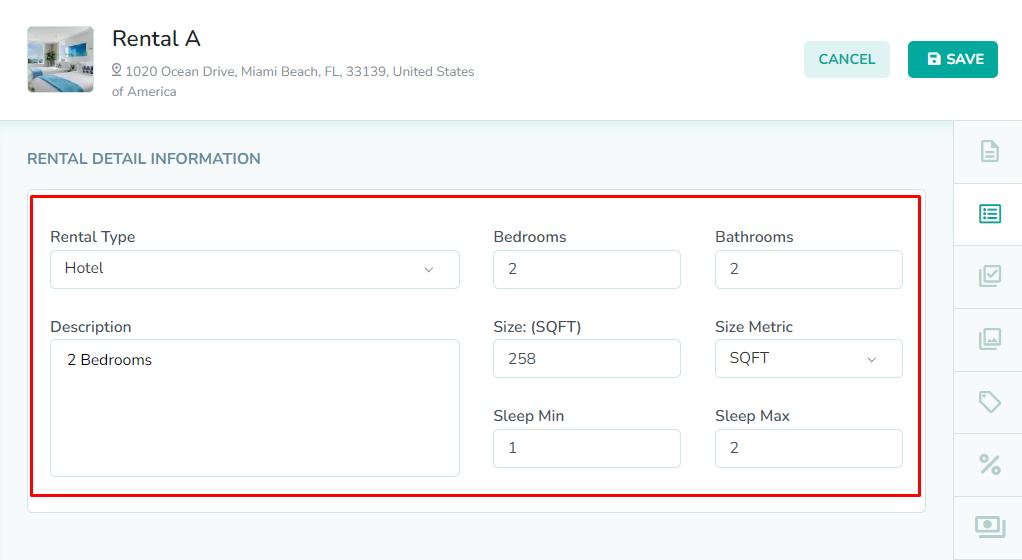
The Rental Detail information tab is the second tab in the right sidebar. This tab contains the rental type and description fields, as well as the room counts, room size, and guest thresholds.
When editing the rental detail information, be sure to enter the correct values for each field, as these will have a direct impact on the rates that are generated for the rental.Review the rental amenities

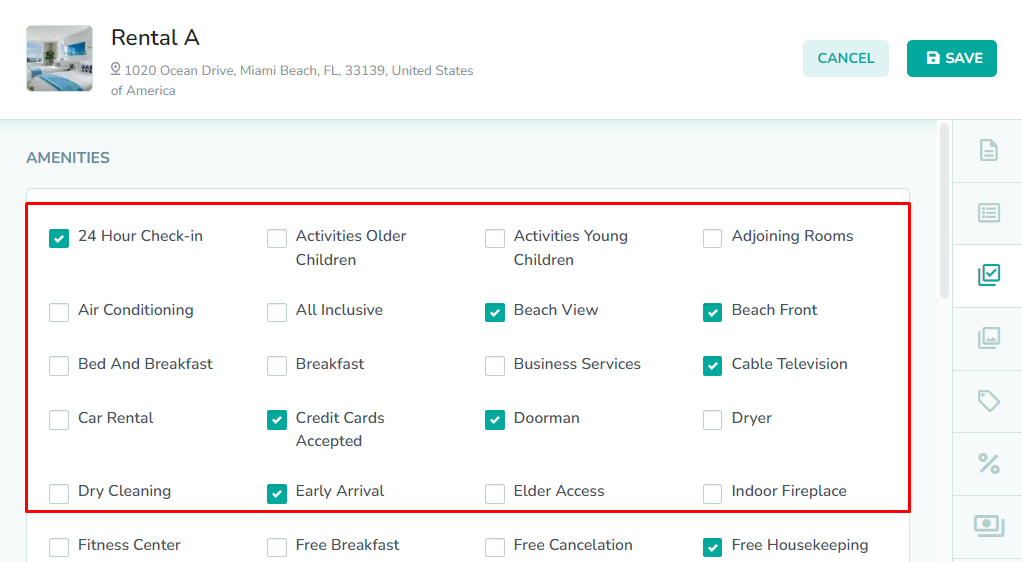
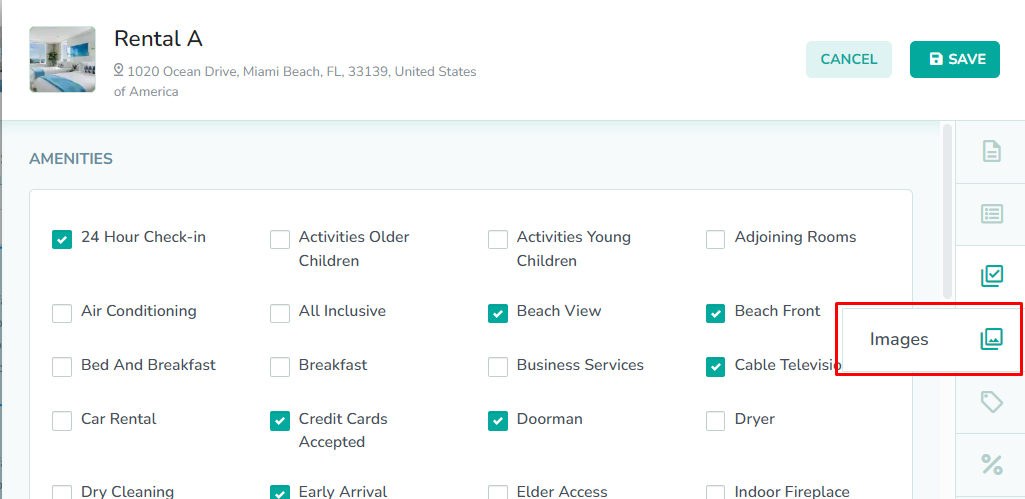
The Amenities tab is the third tab in the right sidebar. This tab contains the different rental amenities that are available for your rental.
This might not represent the full list of rental amenities that are displayed in your channel manager, if Rategenie is connected to one.Review the rental images
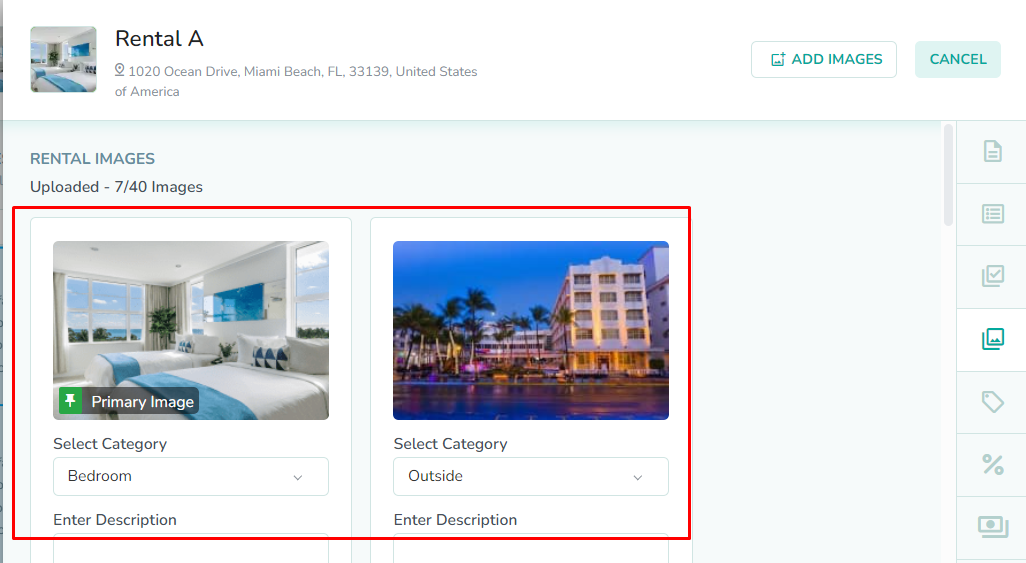
The Images tab is the fourth tab in the right sidebar. This tab contains the image gallery for your rental.
Images will not affect the rates generated for your rental.Review the rental tags

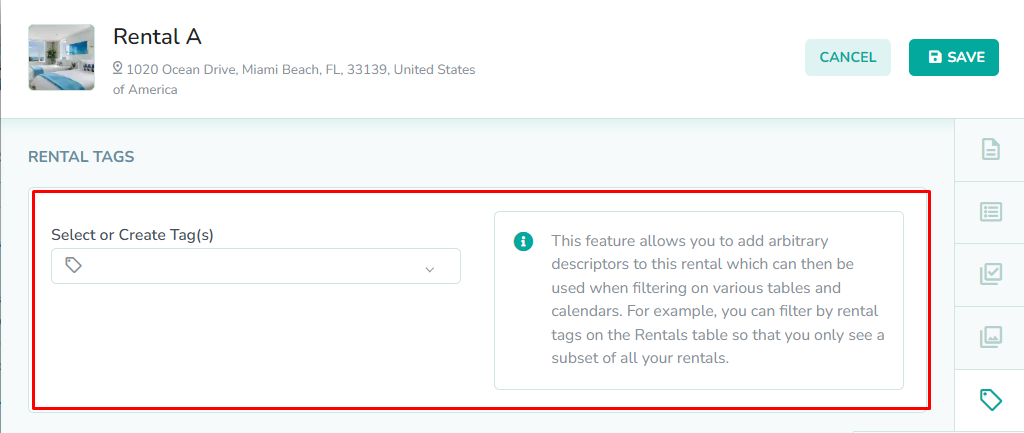
The Tags tab is the fifth tab in the right sidebar. This tab contains the rental tags field that can be used to both create new rental tags, and select existing tags to assign to the rental.
Rental tags will not affect the rates generated for your rental.Review the rental taxes
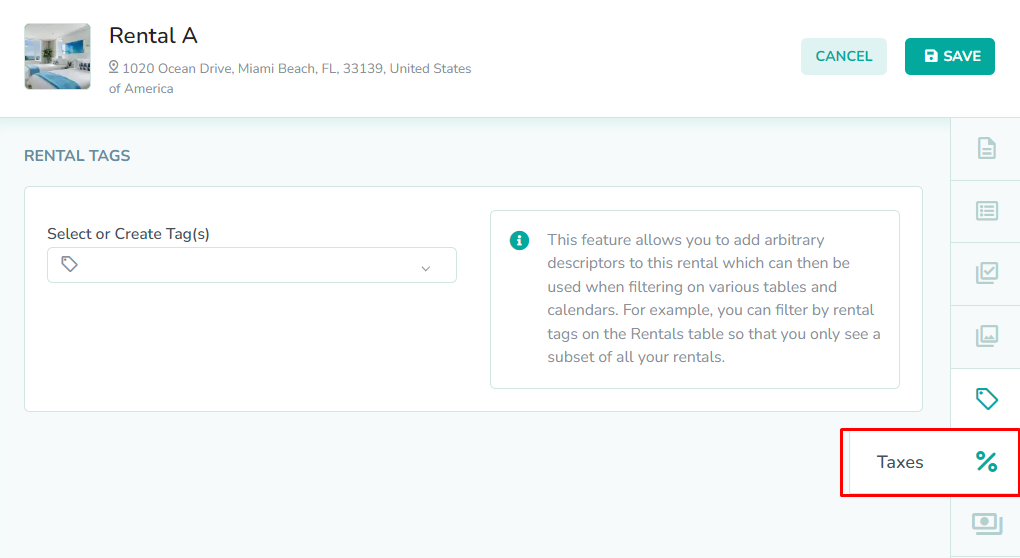
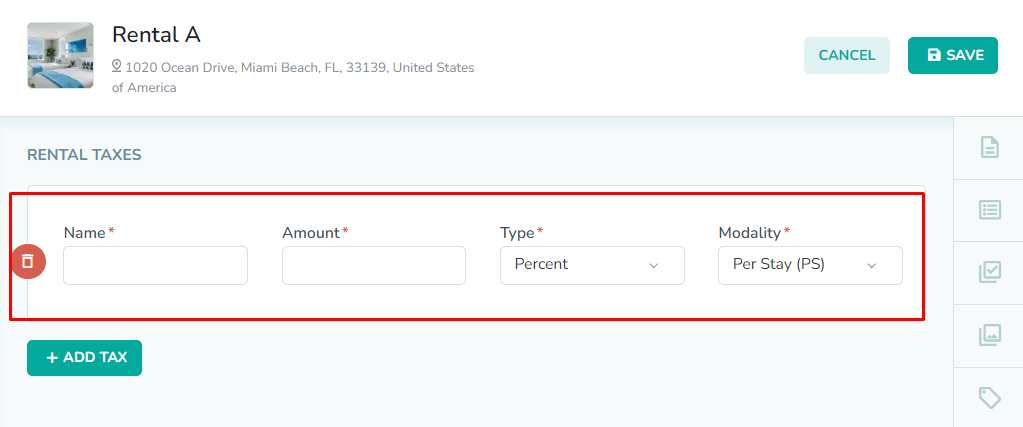
The Taxes tab is the sixth tab in the right sidebar. This tab contains the taxes that will be charged when booking the rental. Click the Add Tax button to add a new rental tax.
The information saved in this tab will be used when syncing rates to any connected channels that use rental taxes.Review the rental fees
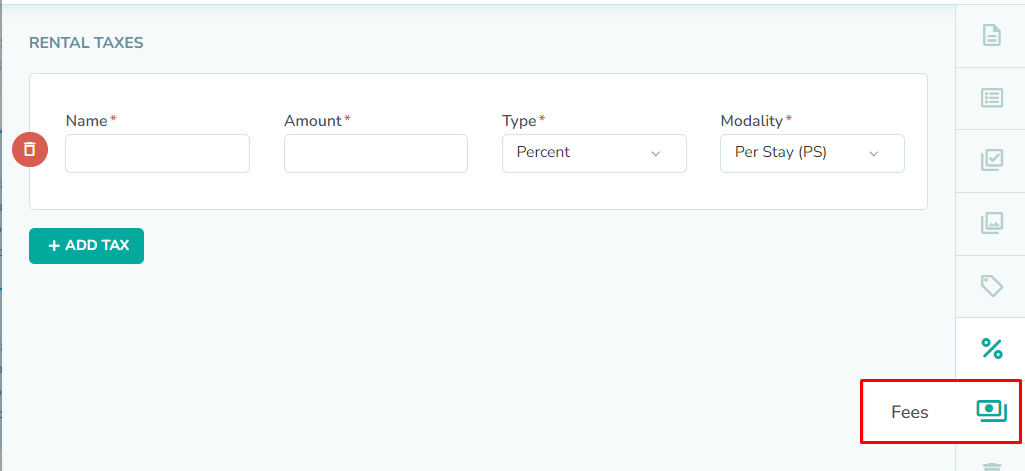

The Fees tab is the seventh option in the right sidebar. This tab contains the fees that will be charged when booking the rental. Click the Add Fee button to add a new rental fee.
The information saved in this tab will be used when syncing rates to any connected channels that use rental fees.OPTIONAL: Delete the rental

The Delete button is the eighth option in the right sidebar. Clicking this button will open the delete rental modal.
Once deleted, a rental can not be recovered. Please be sure you want to delete the rental before performing this action.