Do you want to customize pricing for one of the rentals assigned to your rate strategy? With the Rental Rate Settings feature, you can modify the nightly pricing for any rentals assigned to any of your strategies.
Click on the rental
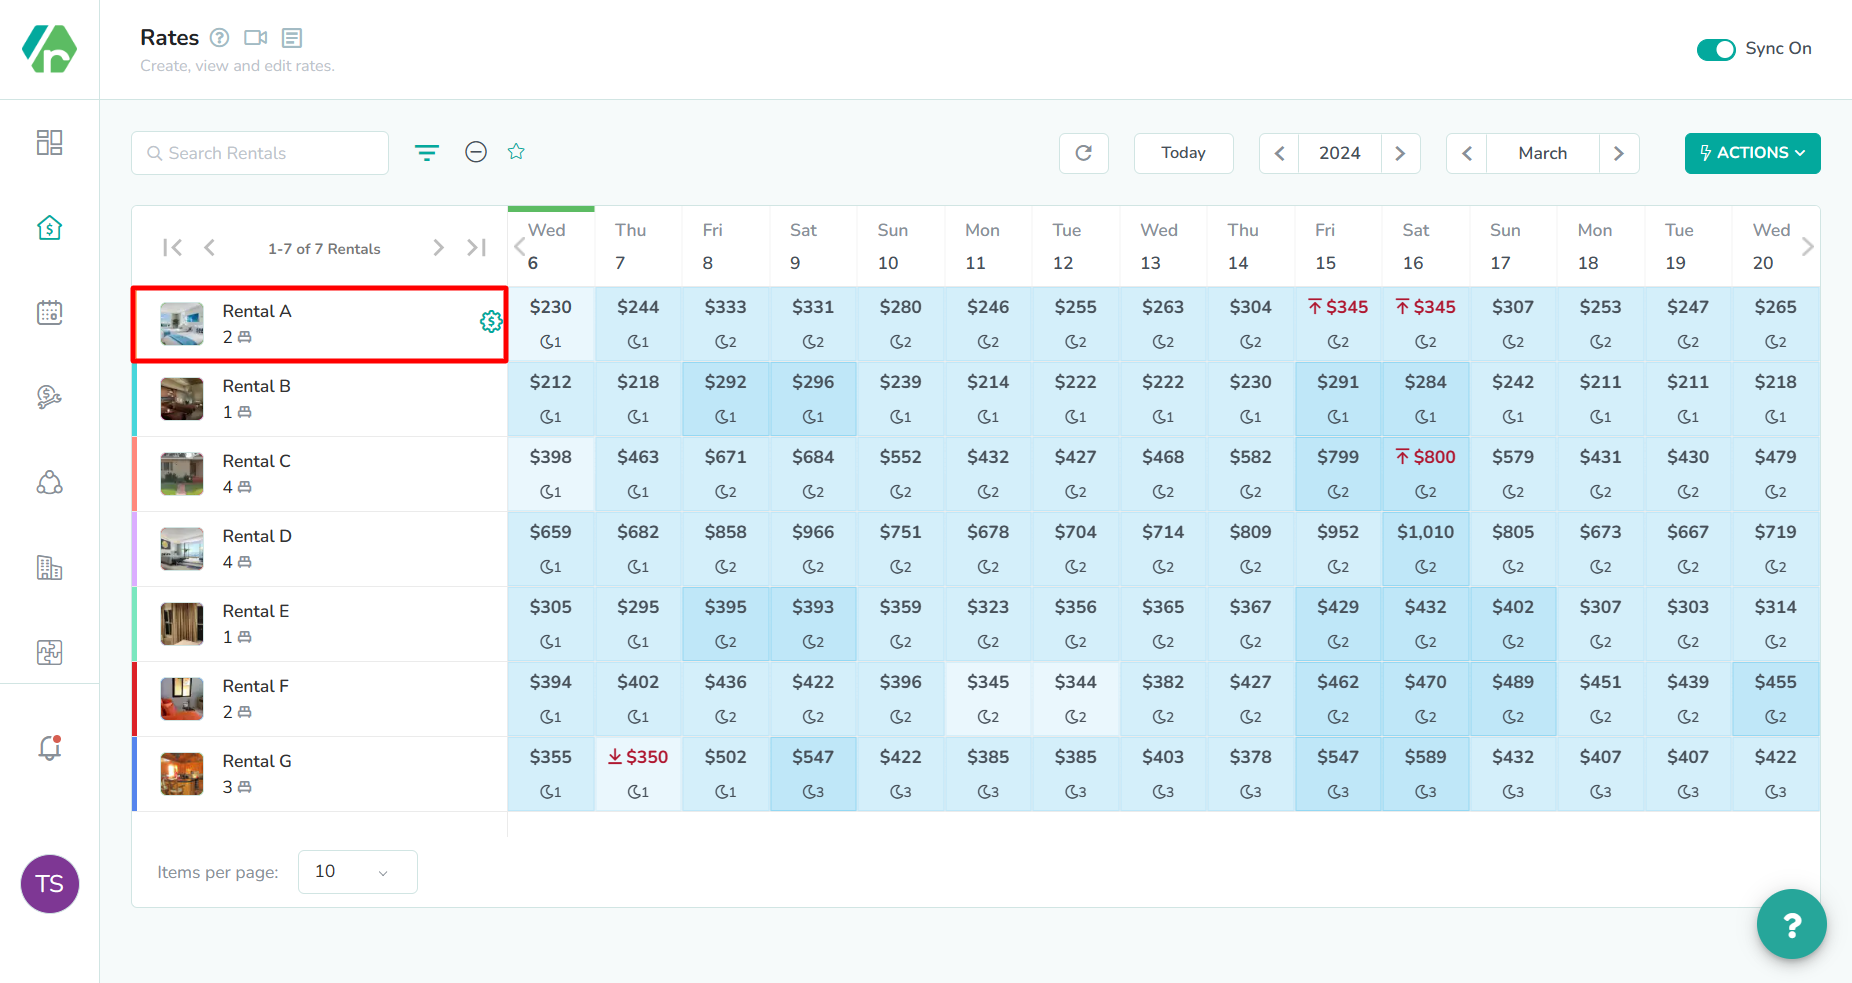
The Rental is located in the left-most column of the rates calendar. Click here to open the rental rates overlay.
Click the Settings tab
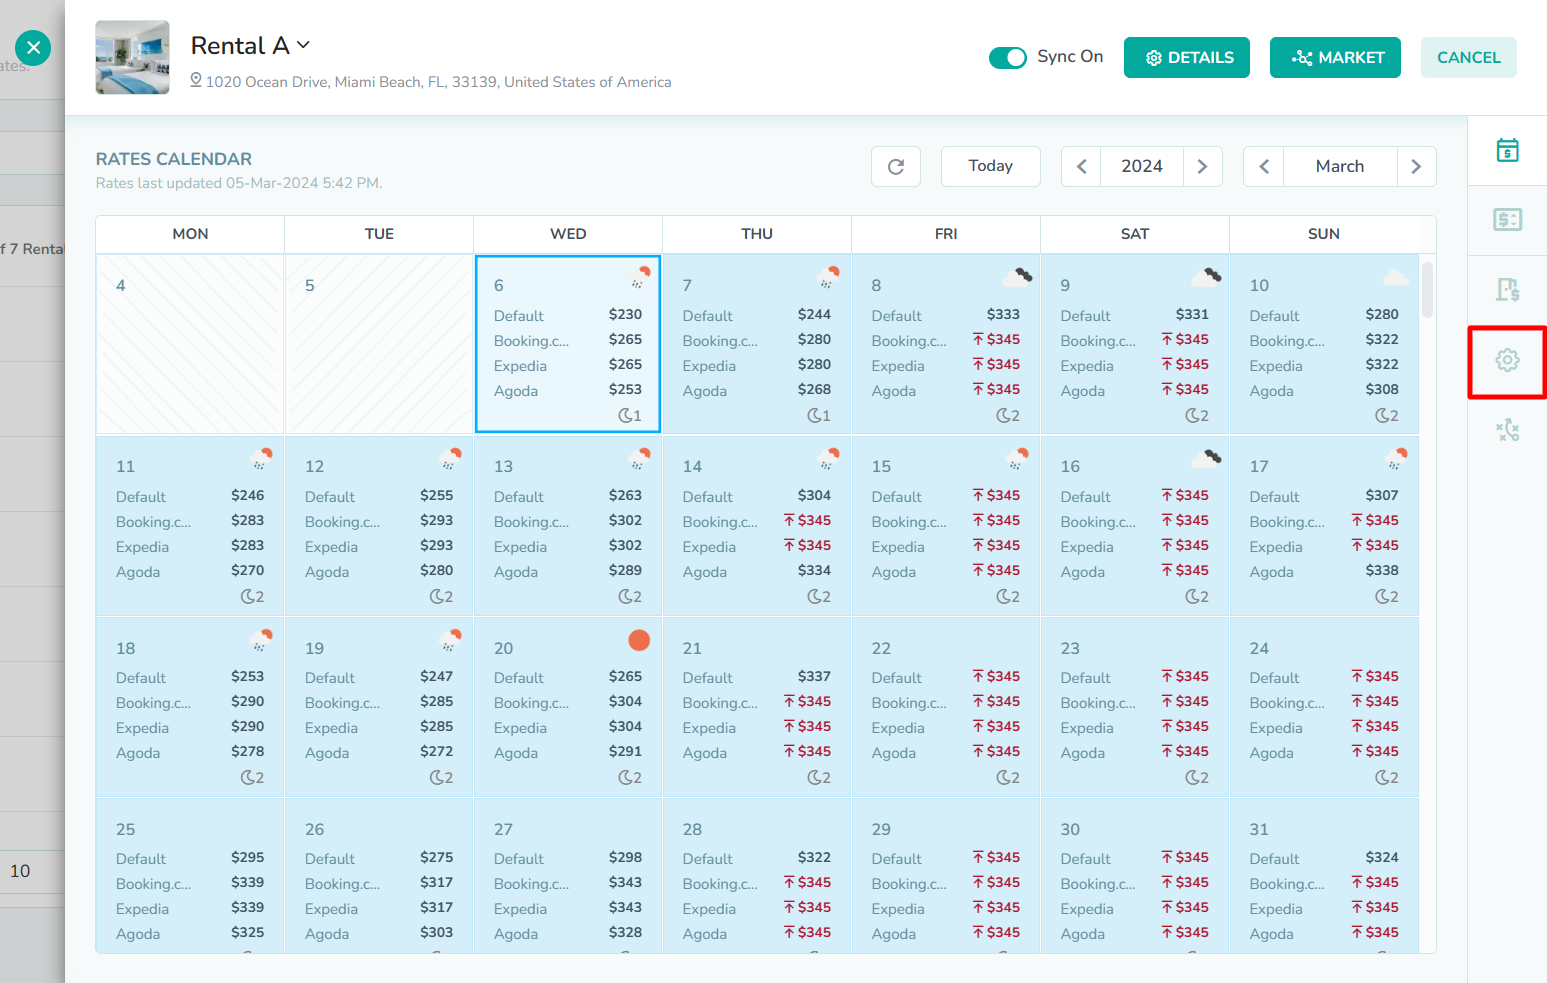
The Settings tab is the fourth option in the right sidebar of the rental rates overlay. Click here to open the rental rate settings.
OPTIONAL: Click the market base rate recommendation button
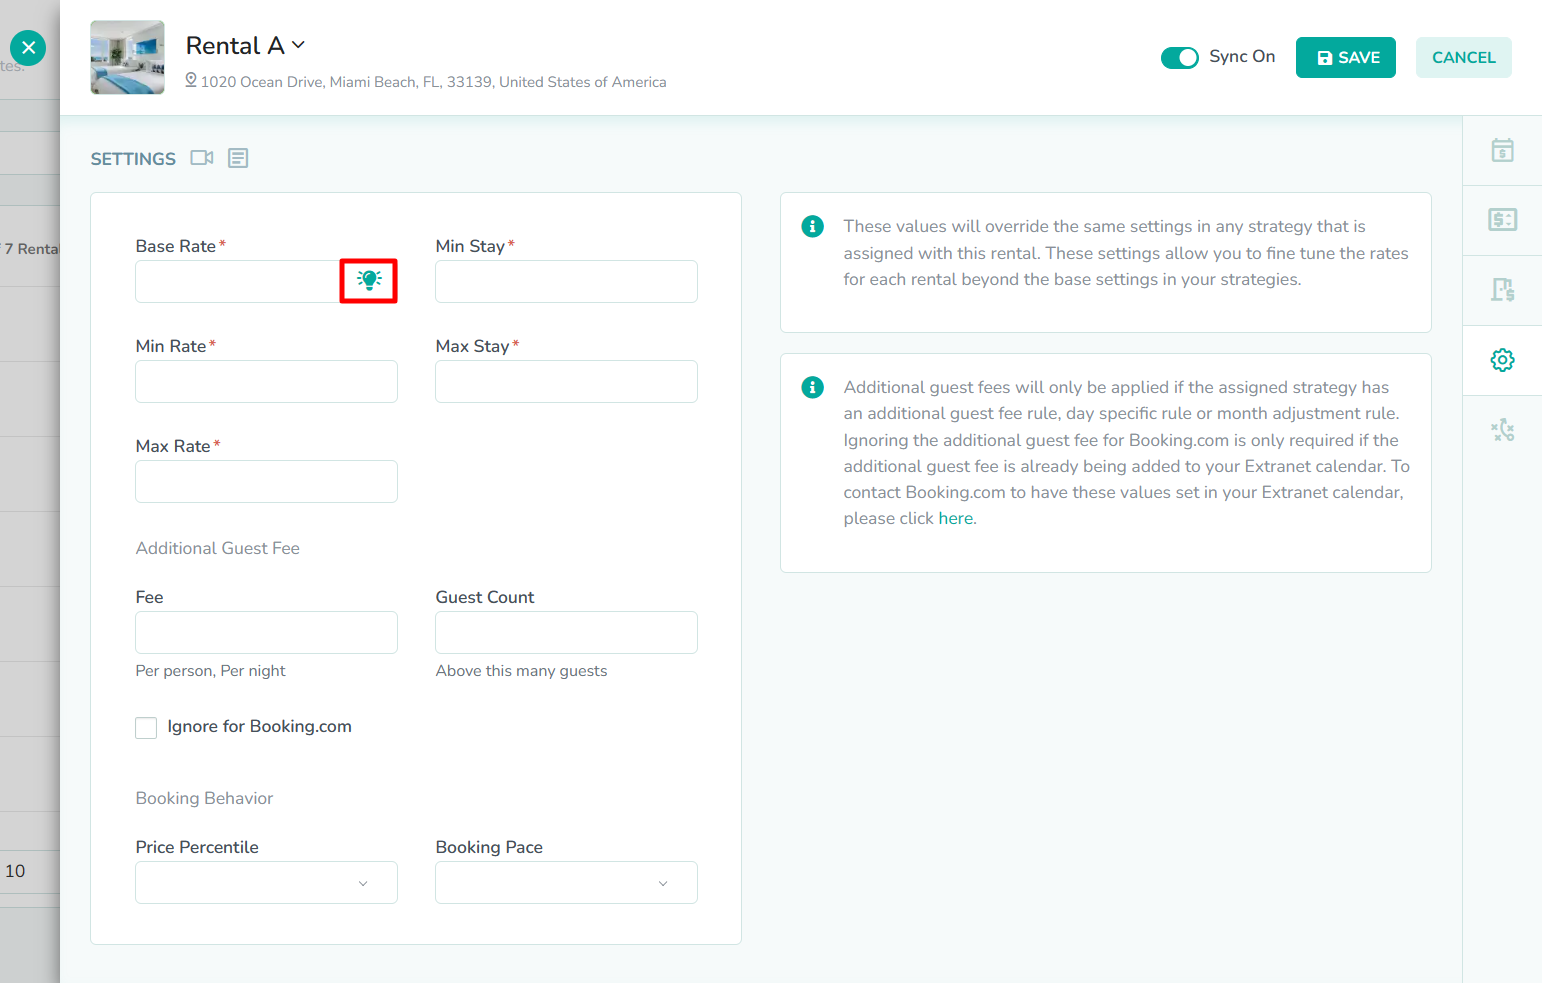
Rategenie has the ability to recommend pricing for your rental, based on market conditions. If you understand how your rental compares to other properties in the same area, then you can use the Market Base Rate Recommendation feature to have Rategenie recommend a base rate for your property based on market data. If you are still unsure of which pricing tier your rental belongs to, for the area where it is located, then you can also take a look at our guide on Market Data, and how to use it to determine your rental's price percentile.
In our example, we already know the price percentile and desired rates for our rental. So, we will not use the Rategenie recommendation. We will instead fill in these fields manually.Enter the base rate
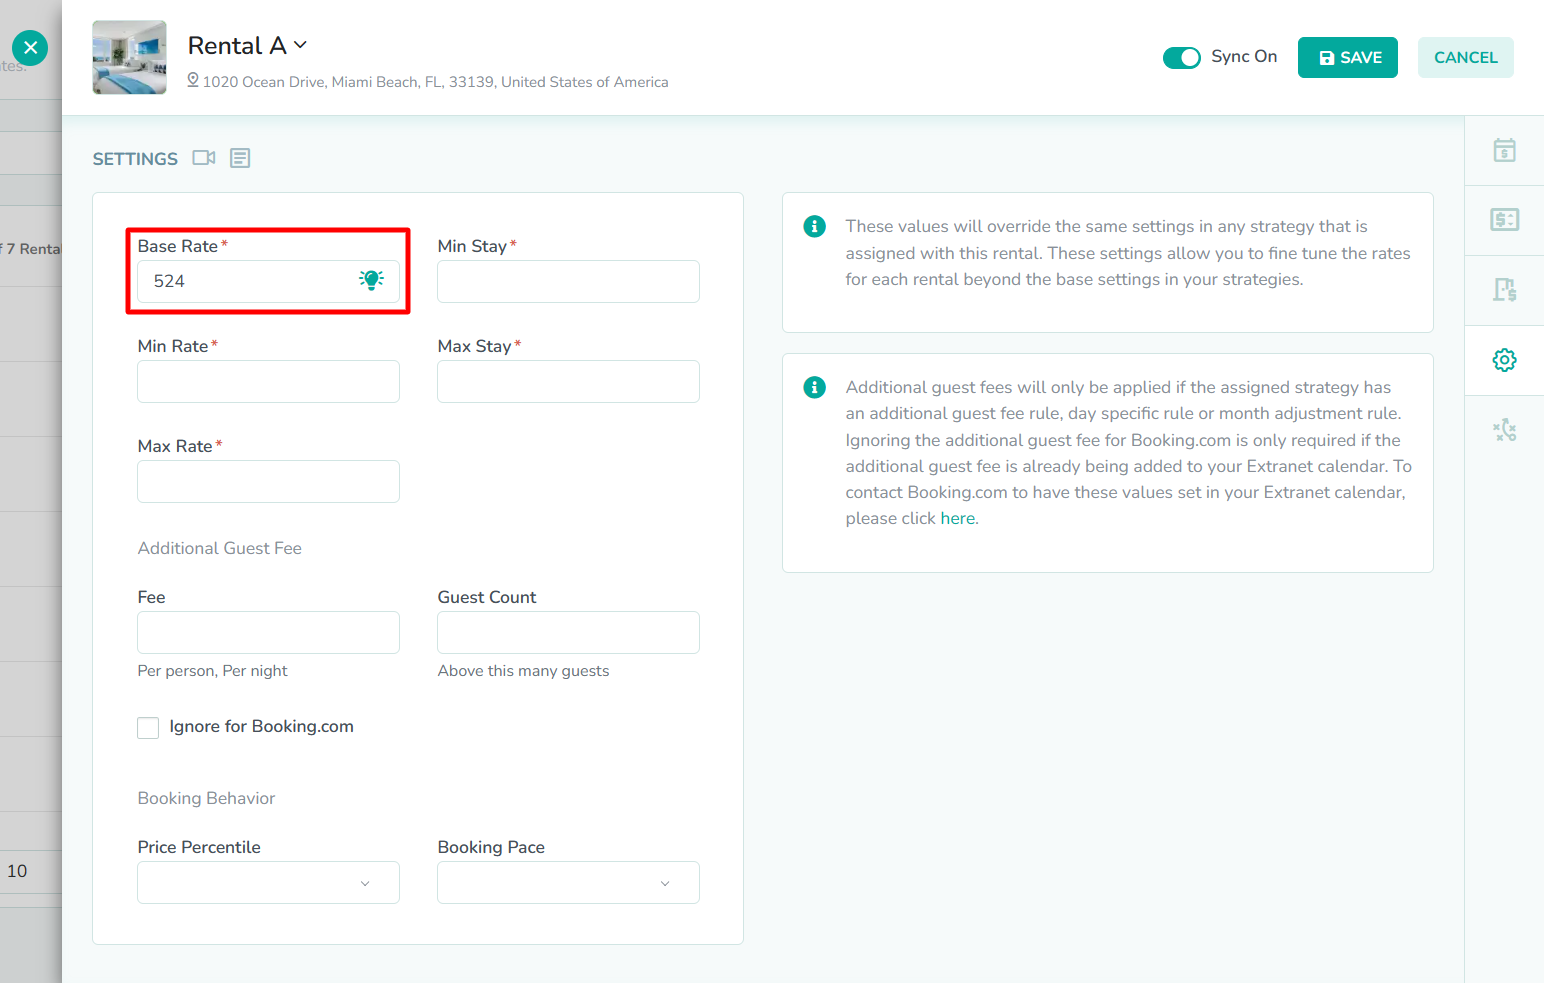
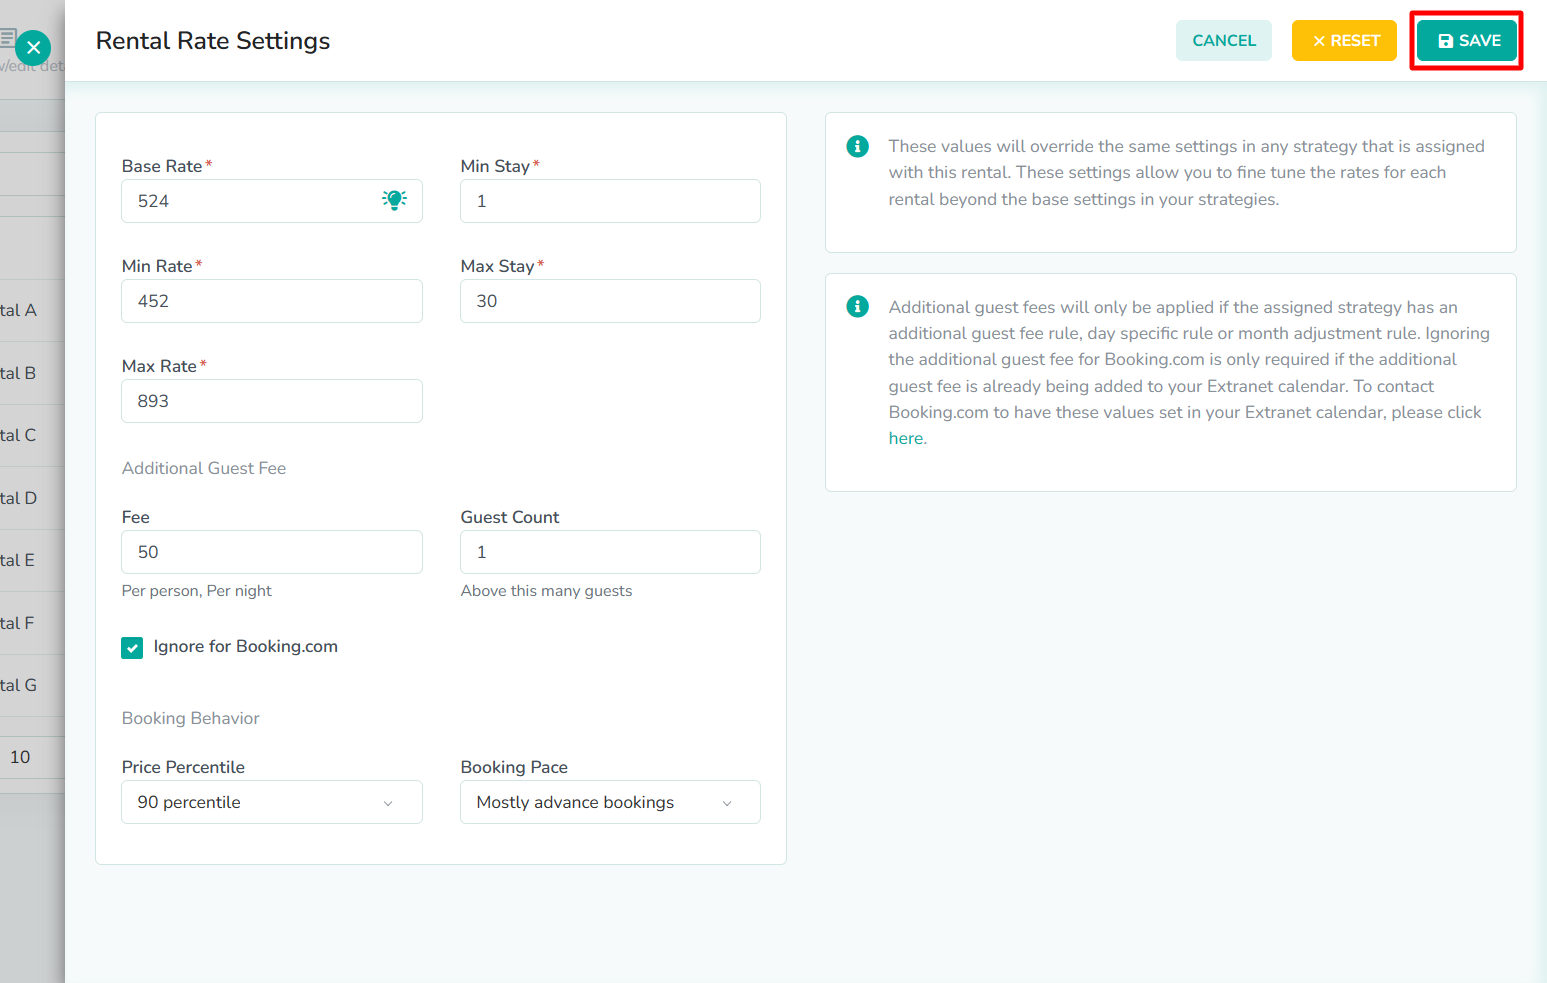
The Settings tab requires five fields to be completed. First, enter the Base Rate, which will determine the starting point when generating each nightly rate. Additional adjustments will be made to this starting point, before generating the final price.
In our example, we have decided on a base rate of $524. This is a nightly rate that has been successful for this rental in the past, so we have opted to stick with this price instead of using the Rategenie recommendation. You can apply your own criteria when choosing a base rate.Enter the minimum rate
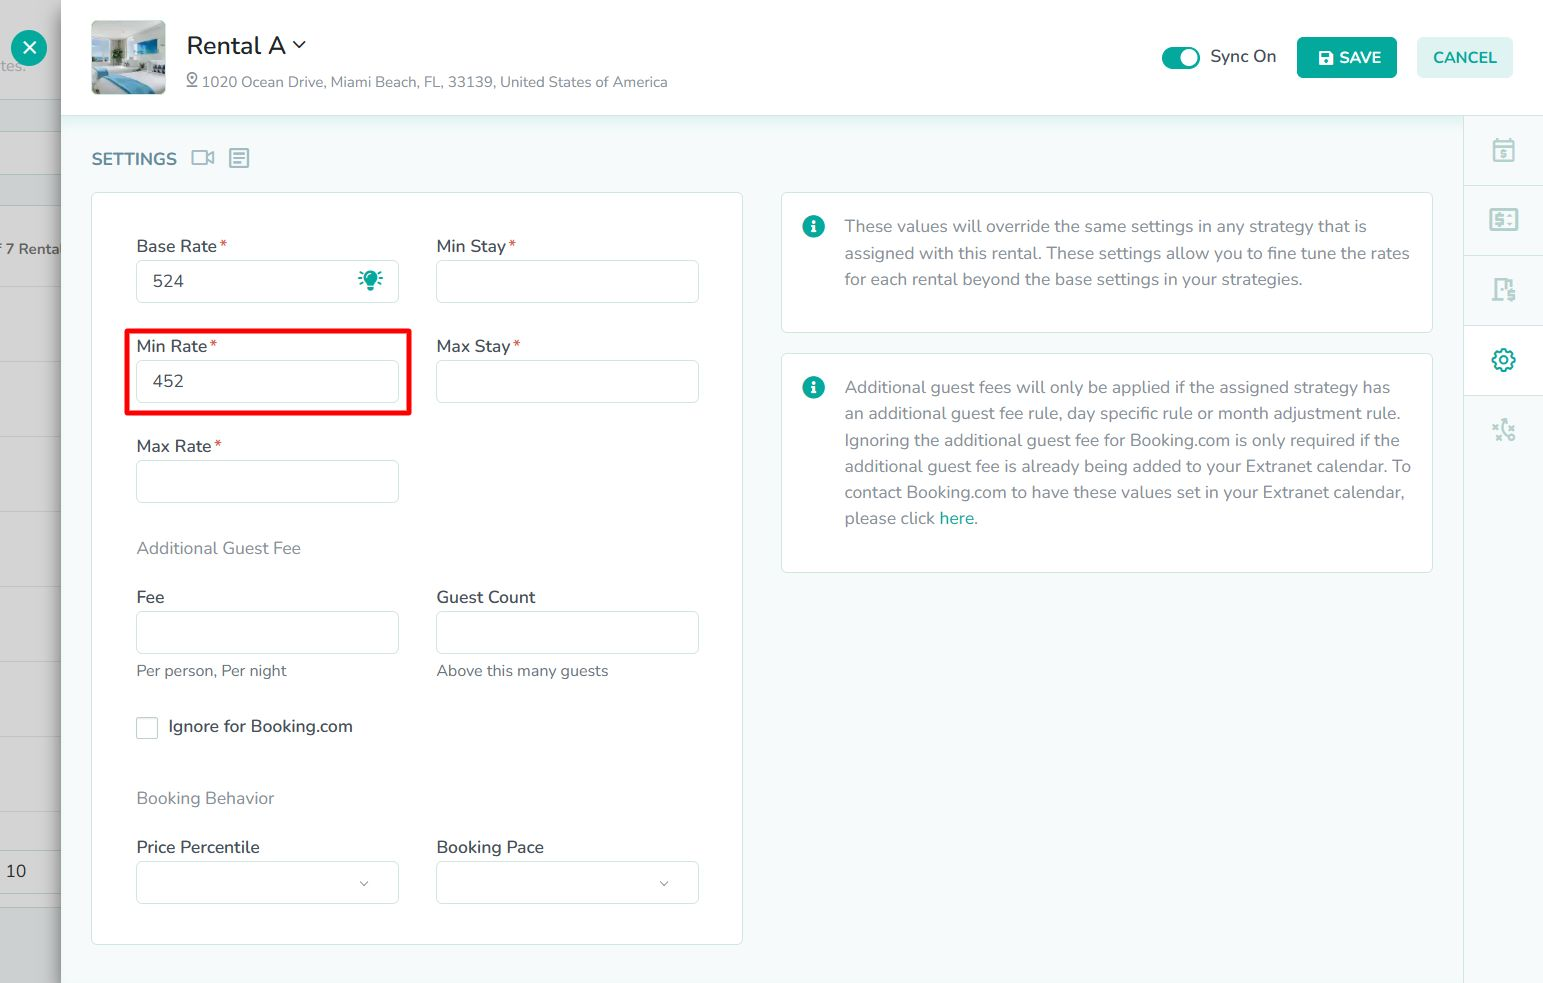
Next, enter the Min Rate, which will determine the lowest nightly rate that can be generated for this rental. Only manual rates can be lower that this value. This value must be lower than the base rate. Minimum rates will appear on the calendar in red.
In our example, we have decided on a minimum rate of $452. This is lowest amount of money that we can charge a guest for a night, while still ensuring profitability after operational expenses are deducted. You can apply your own criteria when choosing a min rate.Enter the maximum rate

Next, enter the Max Rate, which will determine the highest nightly rate that can be generated for this rental. Only manual rates can be higher that this value. This value must be higher than the base rate. Maximum rates will appear on the calendar in red.
In our example, we have decided on a maximum rate of $893. This is highest amount of money that we think a guest will be willing to pay for a night, when taking the entire year into consideration. You can apply your own criteria when choosing a max rate.Enter the minimum stay
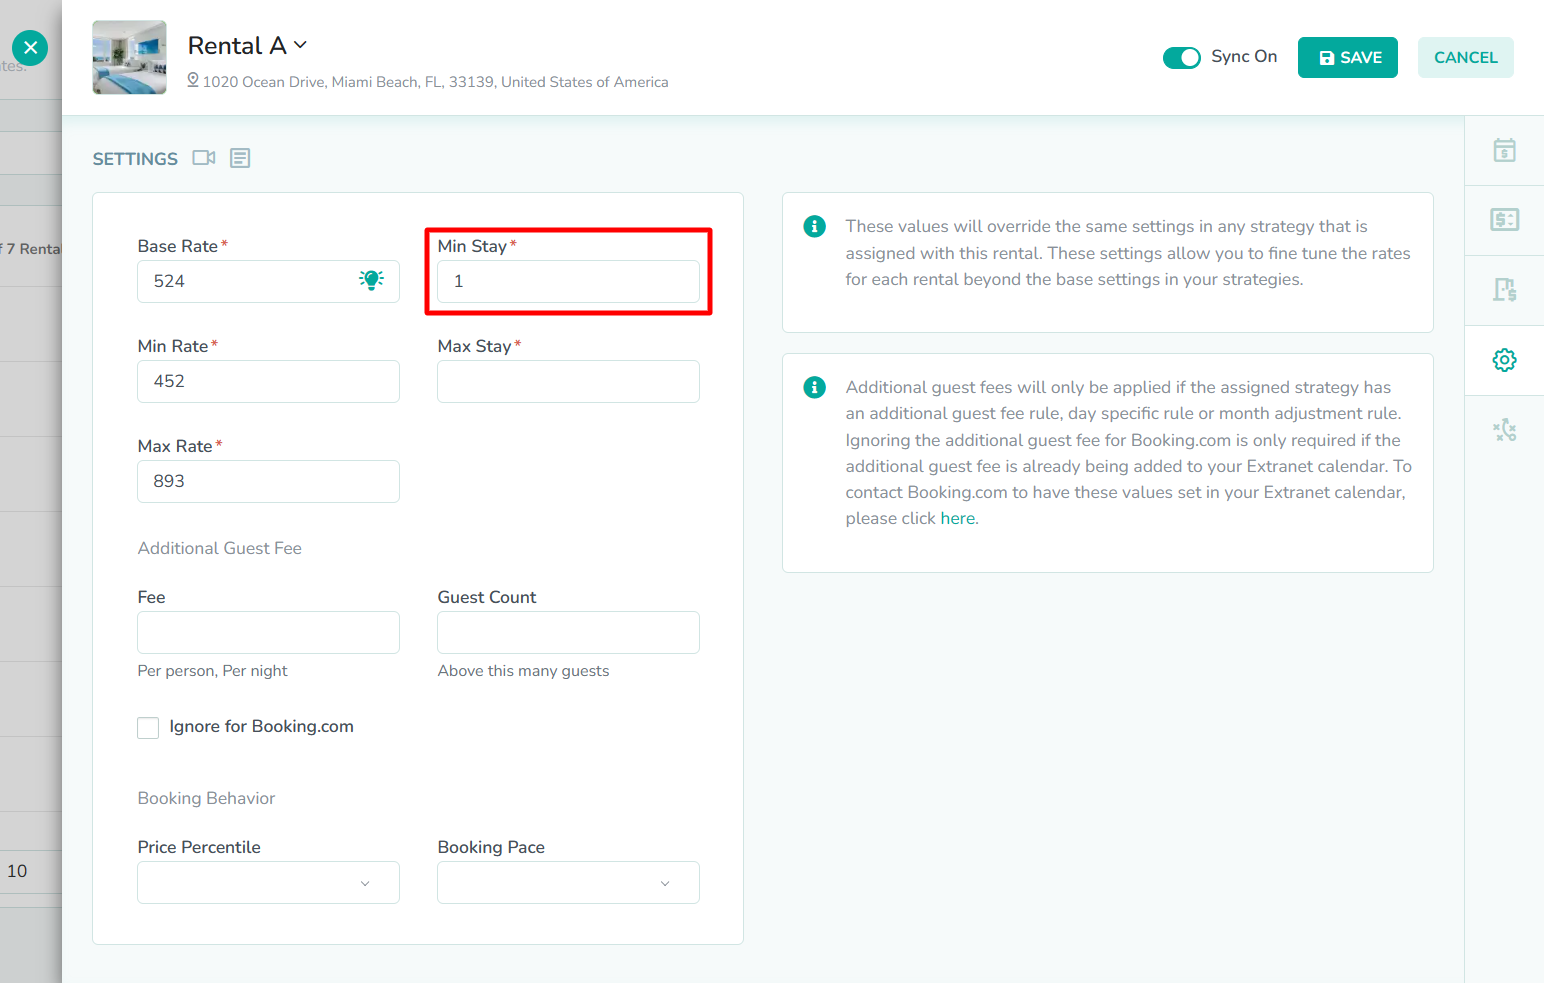
Next, the enter Min Stay, which will determine the minimum number of nights that a guest must stay when making a booking.
In our example, we have entered a value of 1 for the minimum length of stay. This is because this rental is located near the beach, and we would like to attract walk-in customers who might only wish to stay the night. You can apply your own criteria when choosing a min stay.Enter the maximum stay
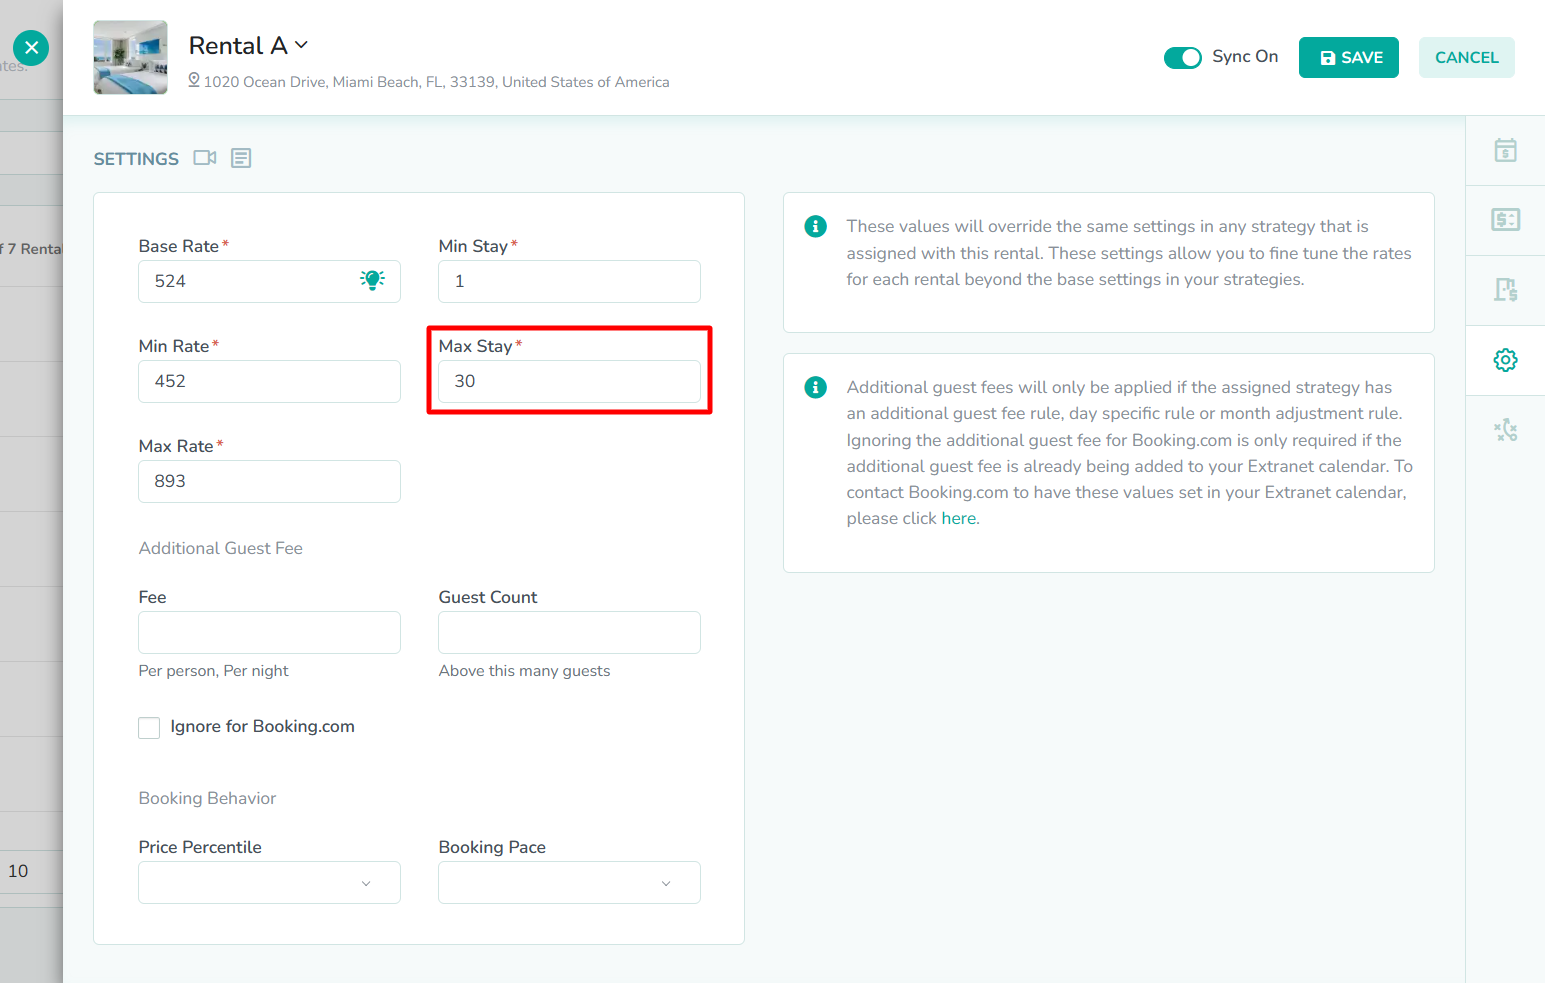
Next, enter the Max Stay, which will determine the maximum number of nights that a guest must stay when making a booking.
In our example, we have entered a value of 30 for the maximum length of stay. This is because this rental is not properly equipped for long-term stays. We also want to expose more guests to our property, so limiting the number of nights that a guest can book will allow us rotate guests at least once per month. You can apply your own criteria when choosing a min stay.OPTIONAL: Enter the additional guest fee
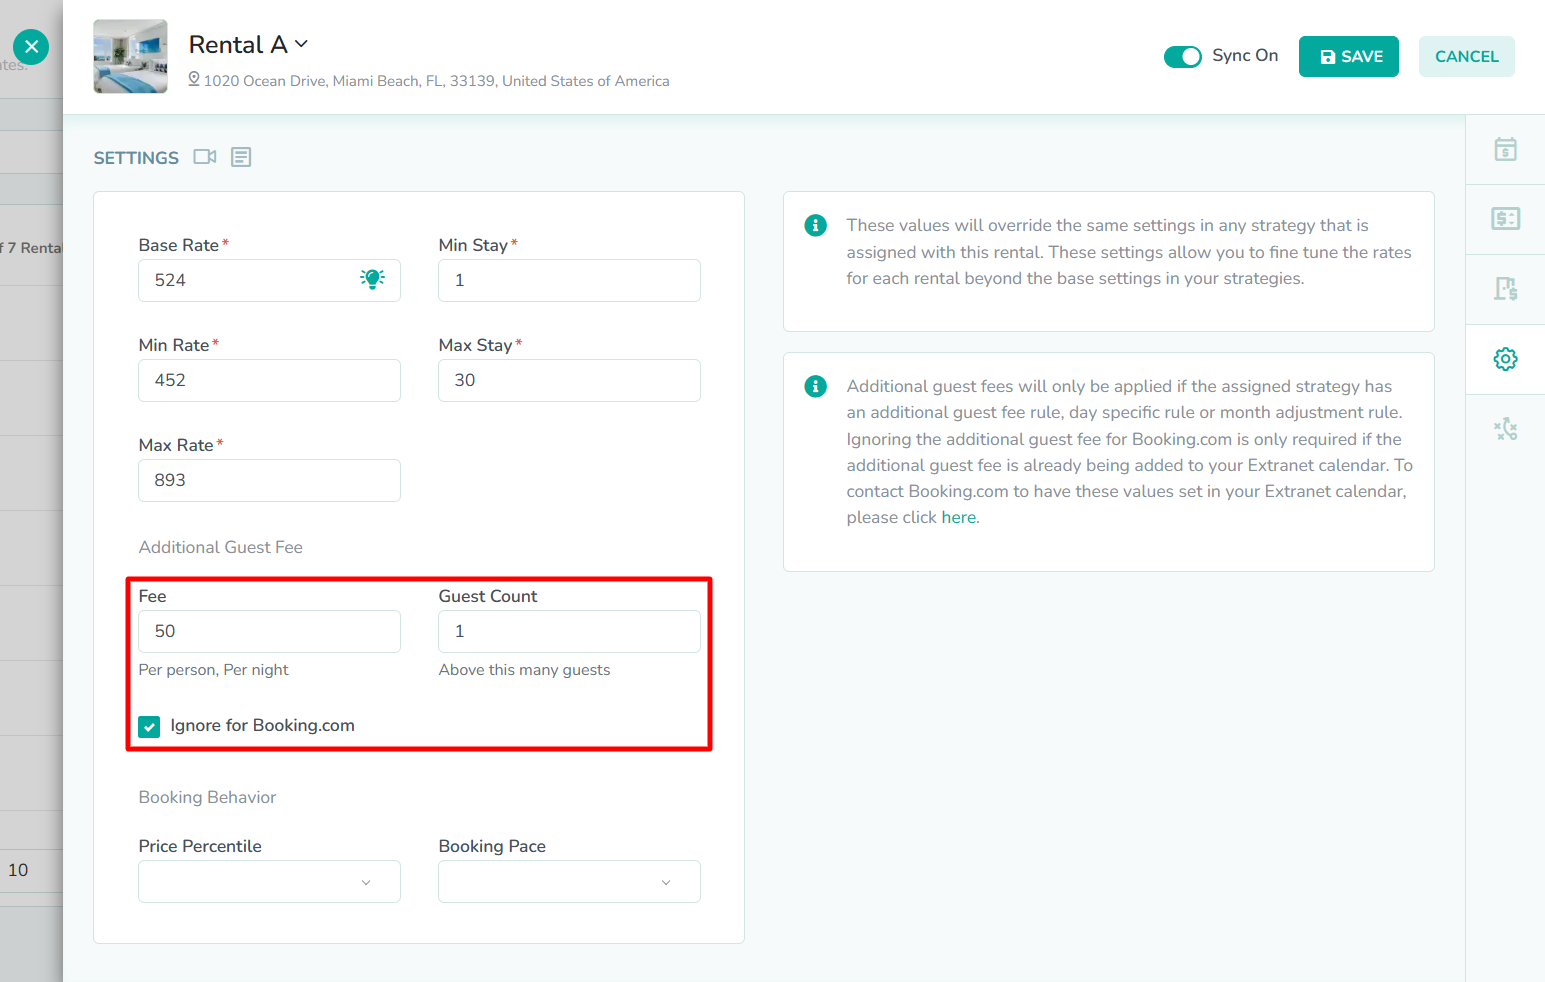
Next, the additional guest fee is composed of two fields and a checkbox. Enter the Fee, which will determine the amount that is added to the nightly rate for each extra guest, up to the maximum guest count set on the channel for your listing. Then enter the Guest Count, which will determine the number of guests that can be booked without being charged the additional guest fee. The Ignore for Booking.com checkbox allows you to specify whether Booking.com will be ignored when applying the additional guest fee. This is useful for property managers who prefer to set their additional guest fee directly in the Booking.com extranet. If you do not charge for extra guests, then you will want to leave these fields blank.
In our example, we have entered a value of $50 for the fee, and we have set the guest count to a value of 1. Our max guest count for this rental is 2 guests. So, if more than one guest books the rental, then an extra fee of $50 will be added to each nightly rate, when the booking total is calculated. We have also selected the Ignore for Booking.com checkbox, as we have already added our additional guest fee directly to our Booking.com listing via the extranet rates and availability calendar. You can apply your own criteria when setting an additional guest fee.OPTIONAL: Select the price percentile
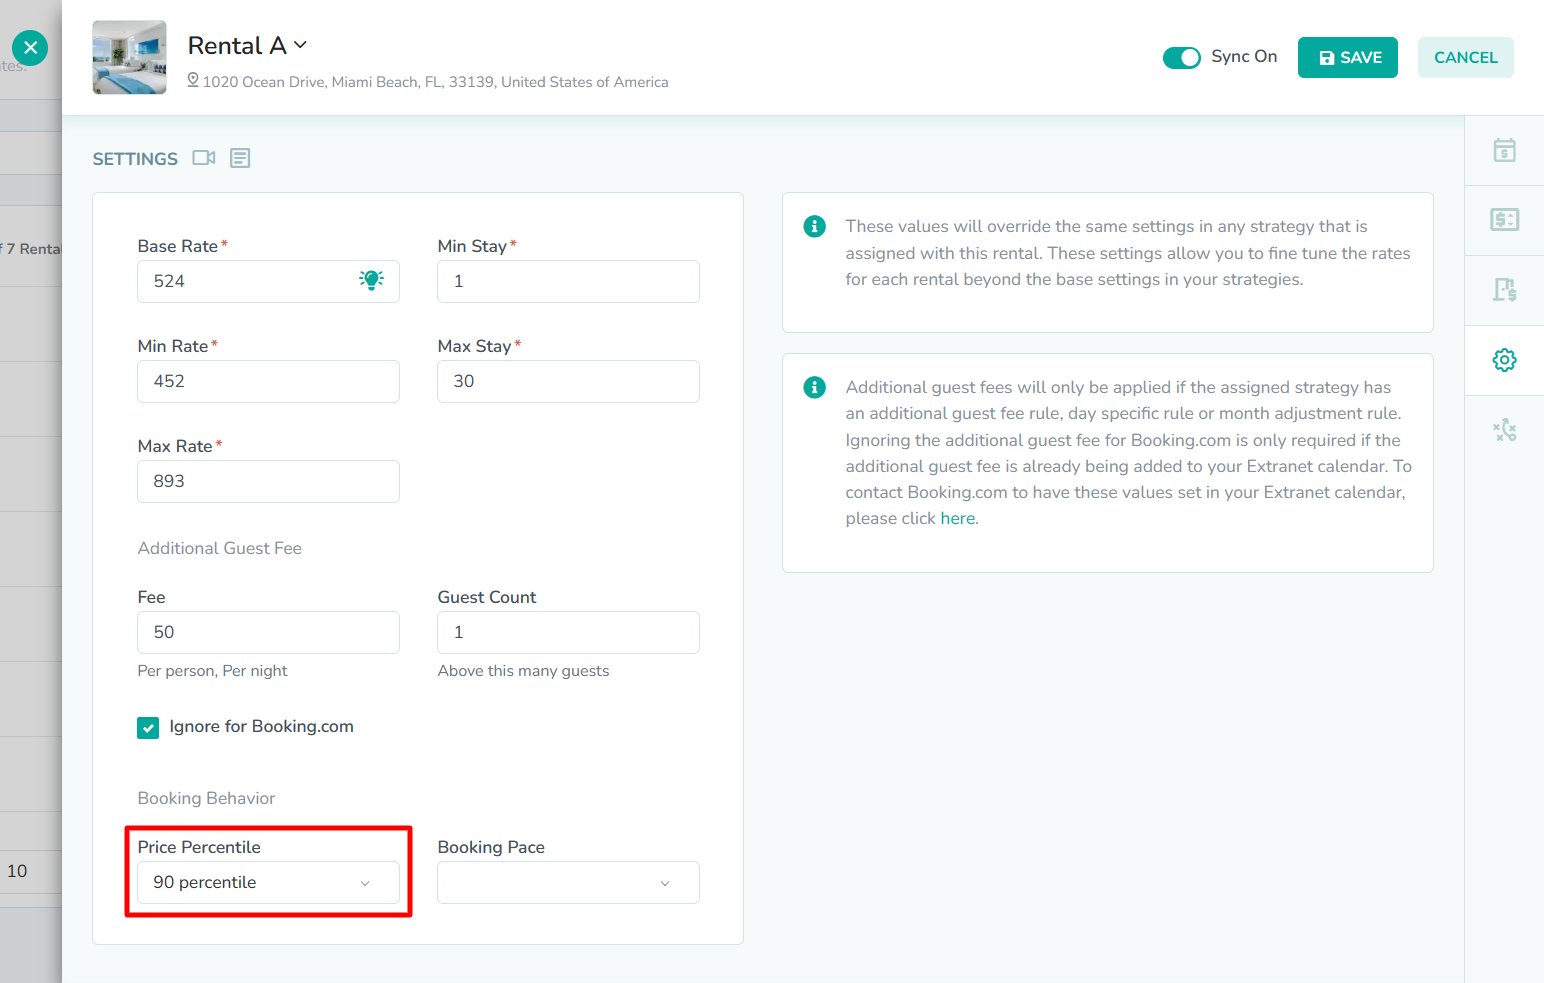
Next, select the price percentile, which allows you to specify the pricing tier of the rental. If 25 percentile is selected, then that would represent a rental that belongs in the lowest pricing tier for the area where is it located. If 90 percentile is selected, then that would represent a rental that belongs in the highest pricing tier. The higher the pricing tier, the more expensive the rental is when compared to the competition in the same area. Rategenie will use the selected price percentile to determine the movement of the nightly prices generated for the Historical Demand and Genie strategies.
The 90th percentile represents the most expensive properties in the area, but that means it also contains the fewest rentals of all of the price percentiles. As a result, rentals assigned to the 90th percentile are more likely to be influenced by outlier pricing behavior from other rentals in the same area.In our example, we have assigned the rental to the 90th percentile. This is due to a combination of factors, such as location and amenities, that we feel distinguish this rental from the competition in the same area. You can apply your own criteria when setting the price percentile.OPTIONAL: Select the booking pace
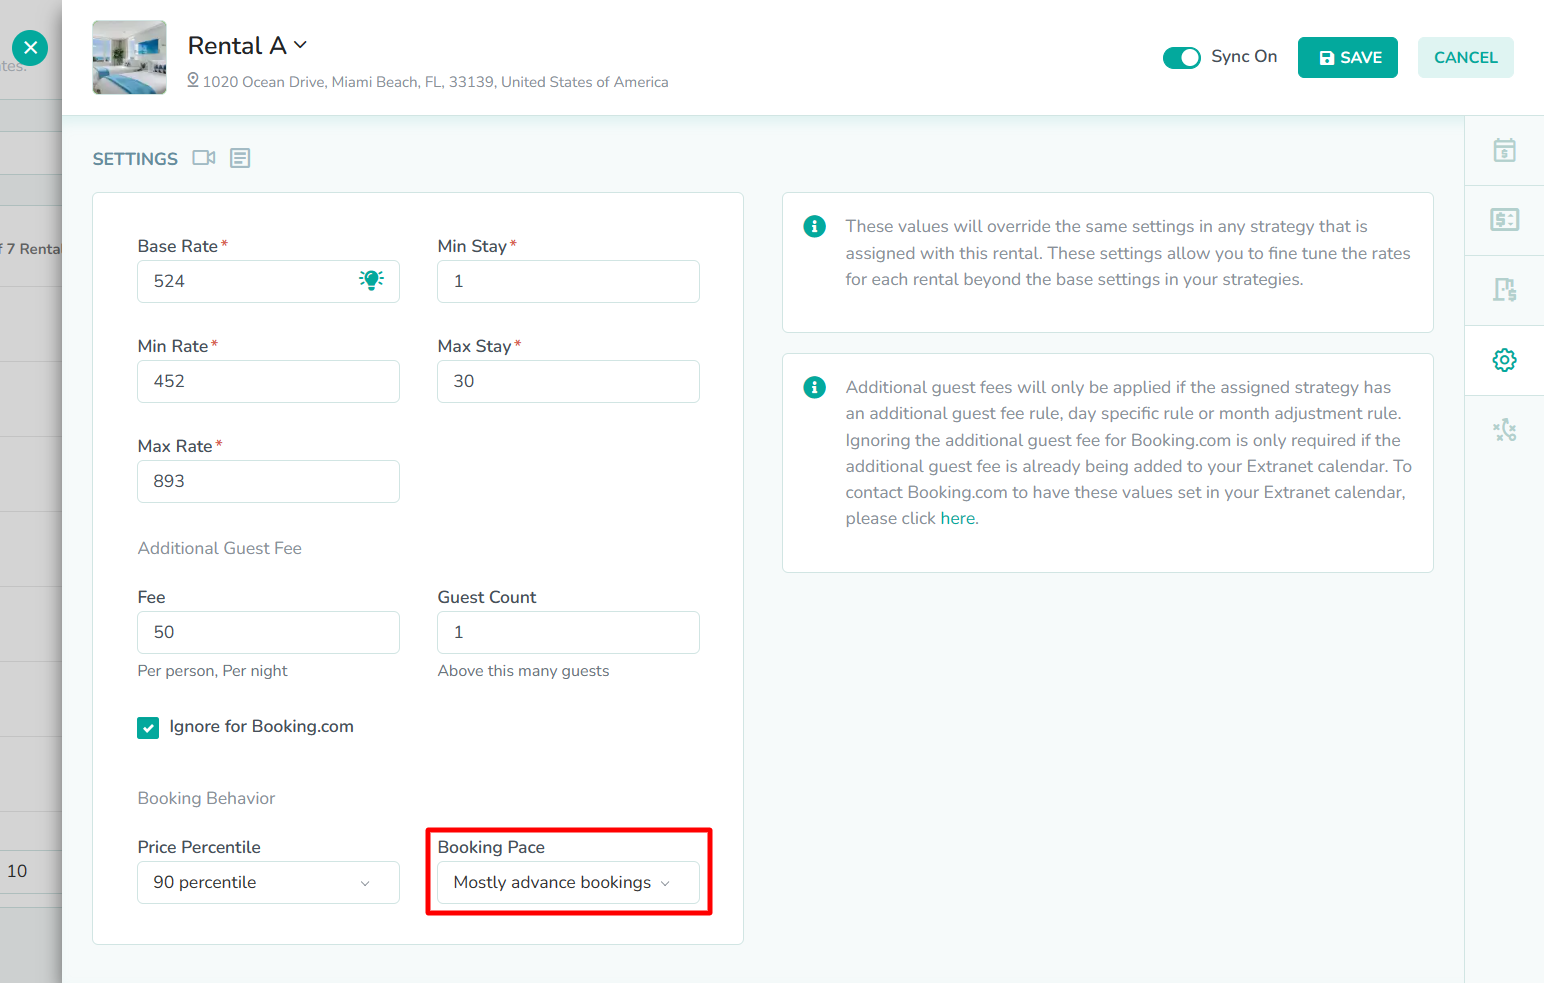
Next, select the booking pace, which allows you to specify how bookings are made for the rental. Depending on the booking behavior for the rental, Rategenie will adjust the rates at different times of year to fully maximize booking revenue. If the booking pace is set to Steady bookings over the year, then Rategenie will distribute pricing evenly across all calendar dates. If the booking pace is set to Mostly last minute bookings, then Rategenie will bias pricing towards upcoming dates. If the booking pace is set to Mostly advance bookings, then Rategenie will bias pricing towards dates in the distant future.
This field is only used by the Genie strategy.In our example, we have selected the Mostly advance bookings option, as the popularity of this rental means that it is almost fully-booked in the near term. The majority of new bookings are six months or more into the future, and we want Rategenie to generate rates that will focus on increasing those future bookings.Click the Save button
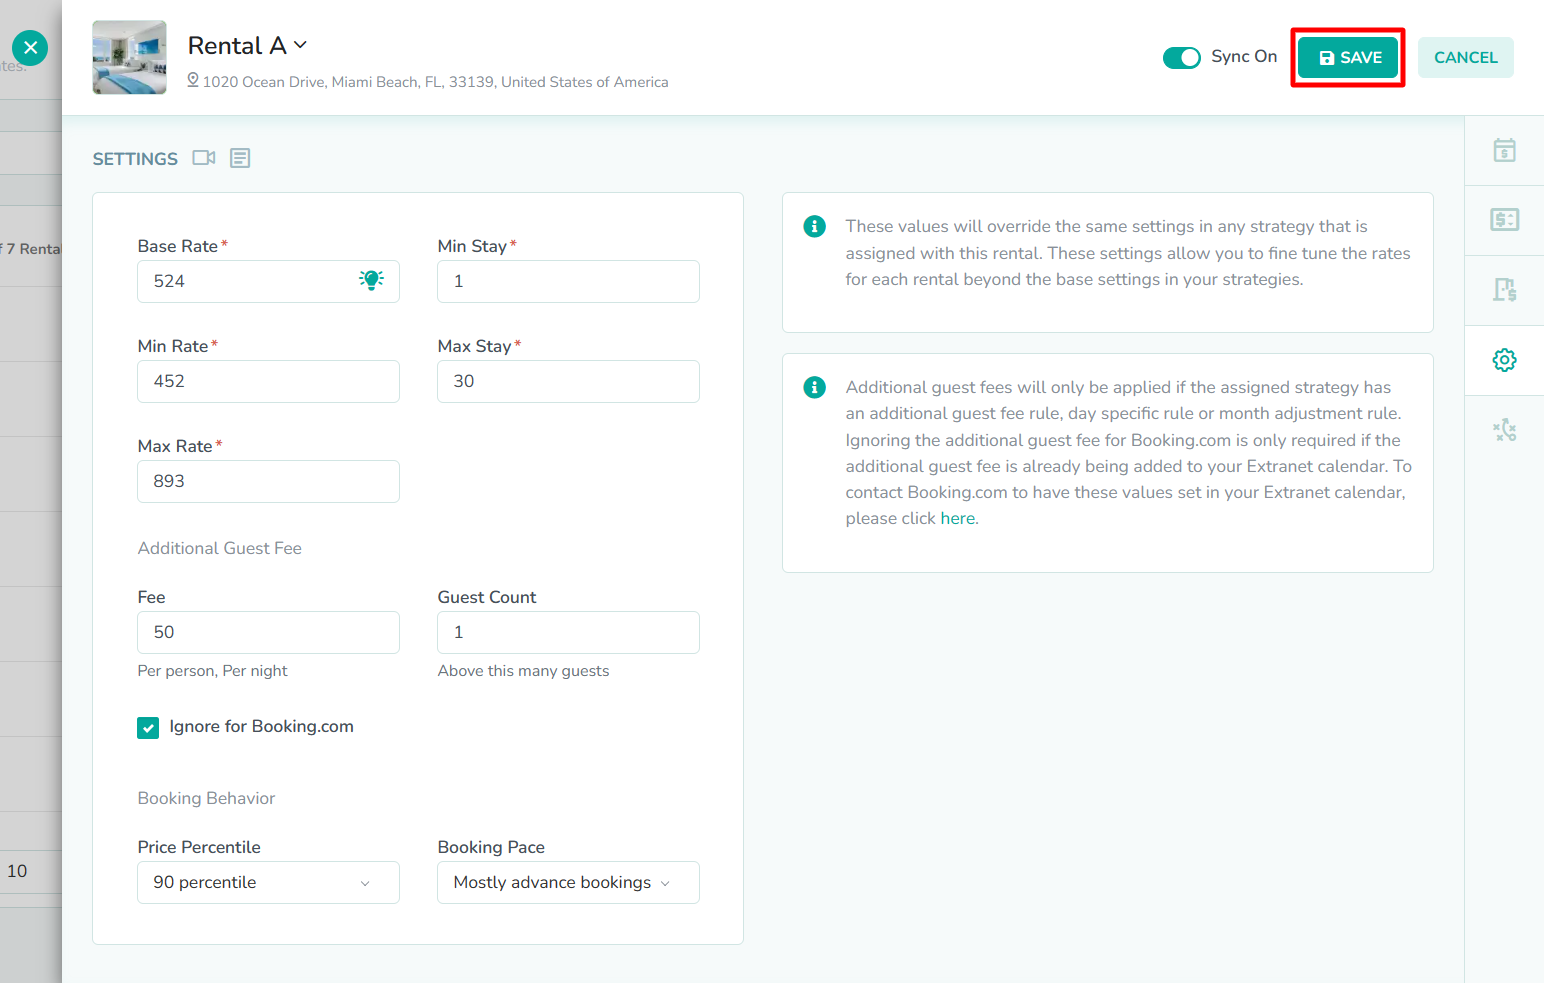
Lastly, click the Save button to save the rental rate settings. New rates will now be generated for this specific rental, using the settings on this tab together with the rest of the rules in the assigned rate strategy.
How to reset the rental rate settings
Click the Reset button
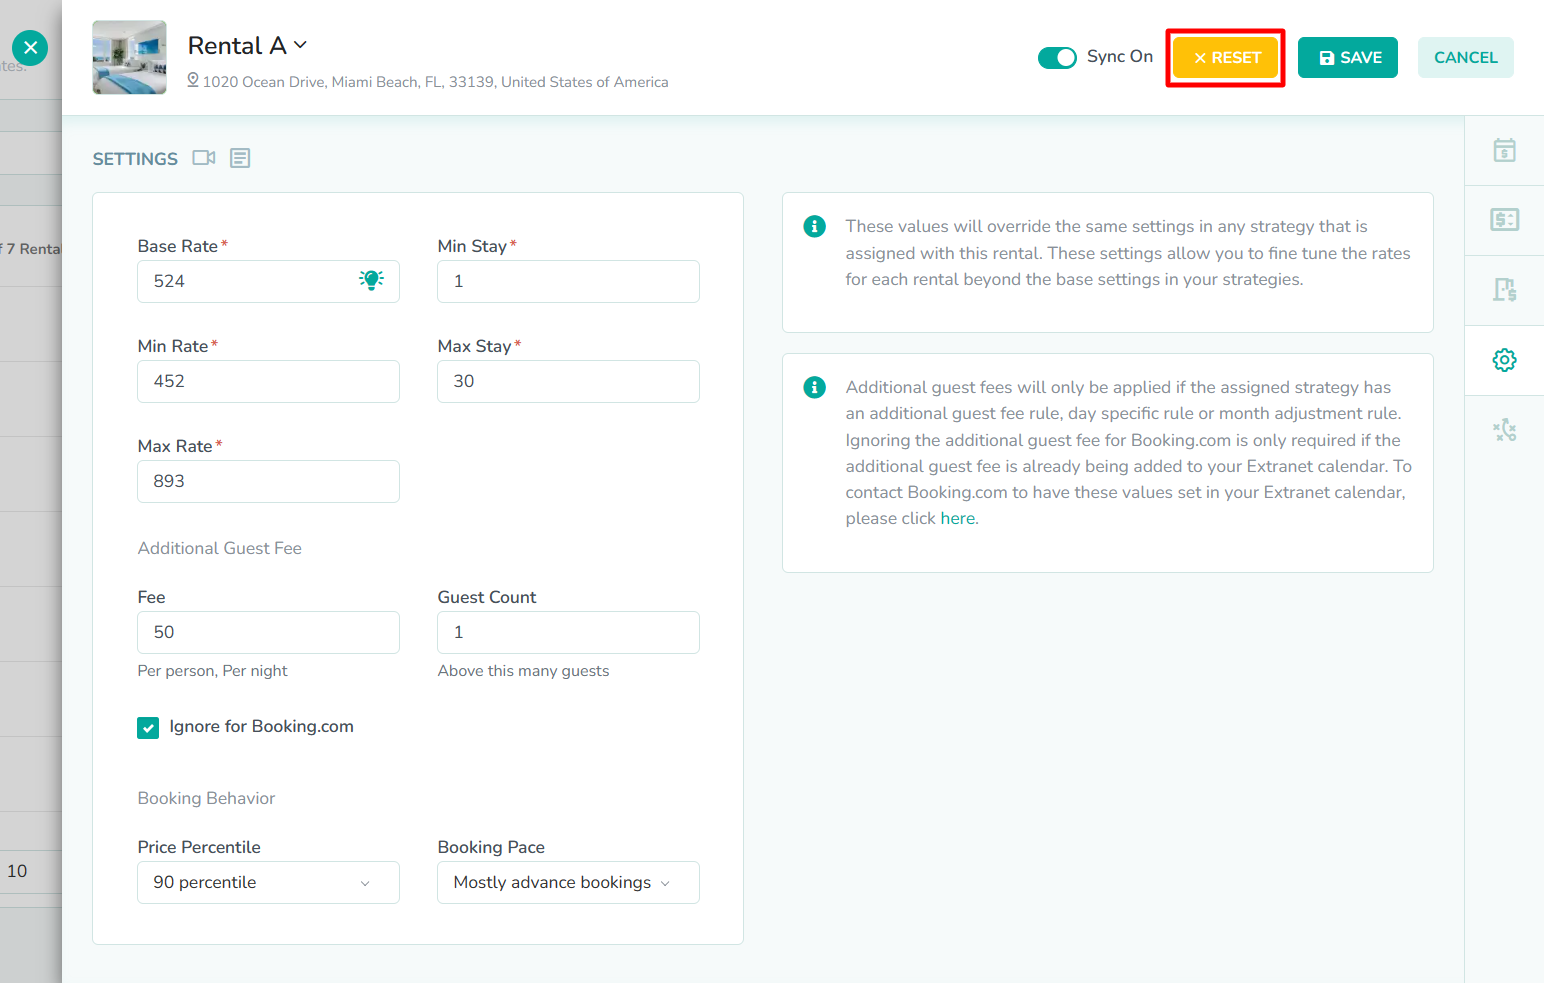
Click the Reset button to clear all of the rental rate settings fields.
How to access the rental rate settings from the rentals page
Click on a rate settings field

The rental rate settings can also be accessed from the Rentals page. The rate settings fields are located in the rentals table, marked by columns Min, Base, and Max. First, click here to open the Rental Rate Settings overlay.
Edit the rental rate settings

Next, enter new values into the fields, or update the existing values by repeating Step 3 through Step 11 from earlier in this guide.
Click the Save button
Lastly, click the Save button to save the rental rate settings. New rates will now be generated for this specific rental, using the settings on this overlay together with the rest of the rules in the assigned rate strategy.