Rate Mappings: How to configure channel rate pushes
Updated
by
Tokeet Support
Do you want Rategenie to push rates to a specific rate plan for your listing? With the Rate Mappings feature, you can select a specific rate category in your channel listing that you want to sync rates to.
Rategenie can only push rates to one rate category per channel listing. If your listing has multiple rate categories, then you must select one rate category that will serve as the standard rate. For most channel listings, there will already be a Standard Rate category created with the listing.
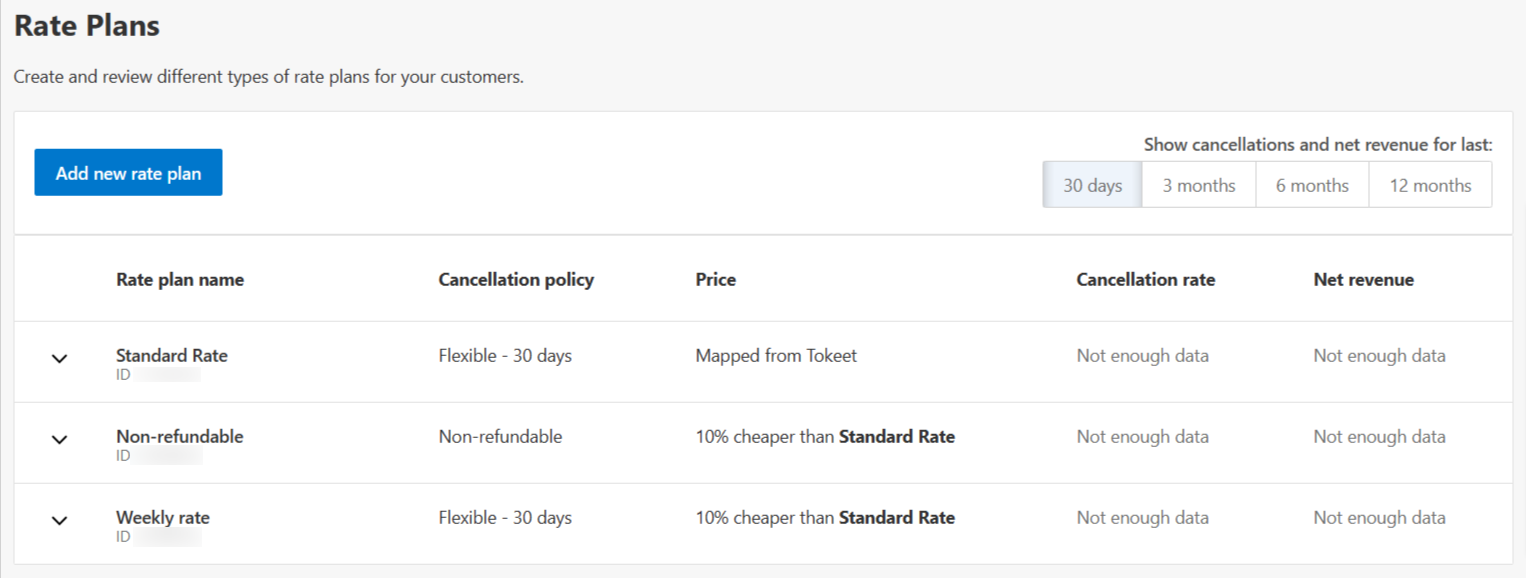
Let's take a look at an example where we create a rate mapping for our Booking.com listing. Our listing has a Standard Rate category, a Non-Refundable rate category, and a Weekly rate category. The Non-Refundable and Weekly rate categories have been configured to use the Standard Rate to generate their own rates. So, we want to push our rates specifically to the Standard Rate category on our Booking.com listing.
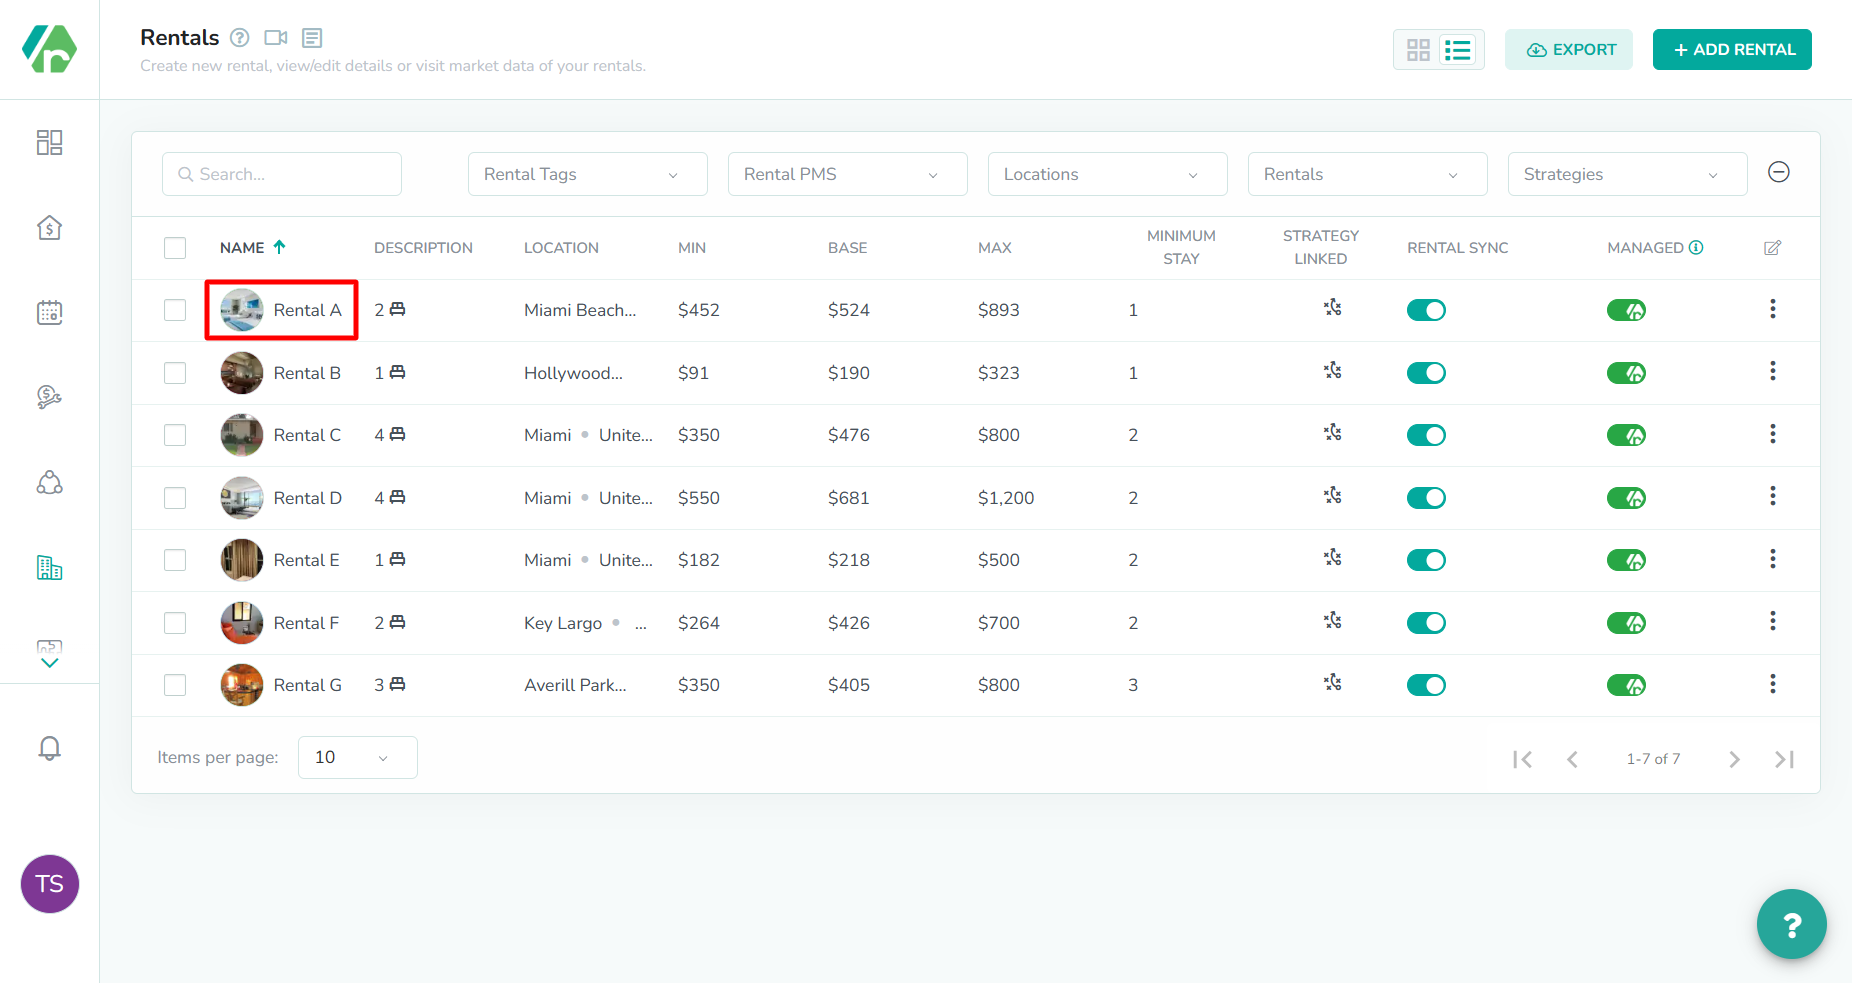
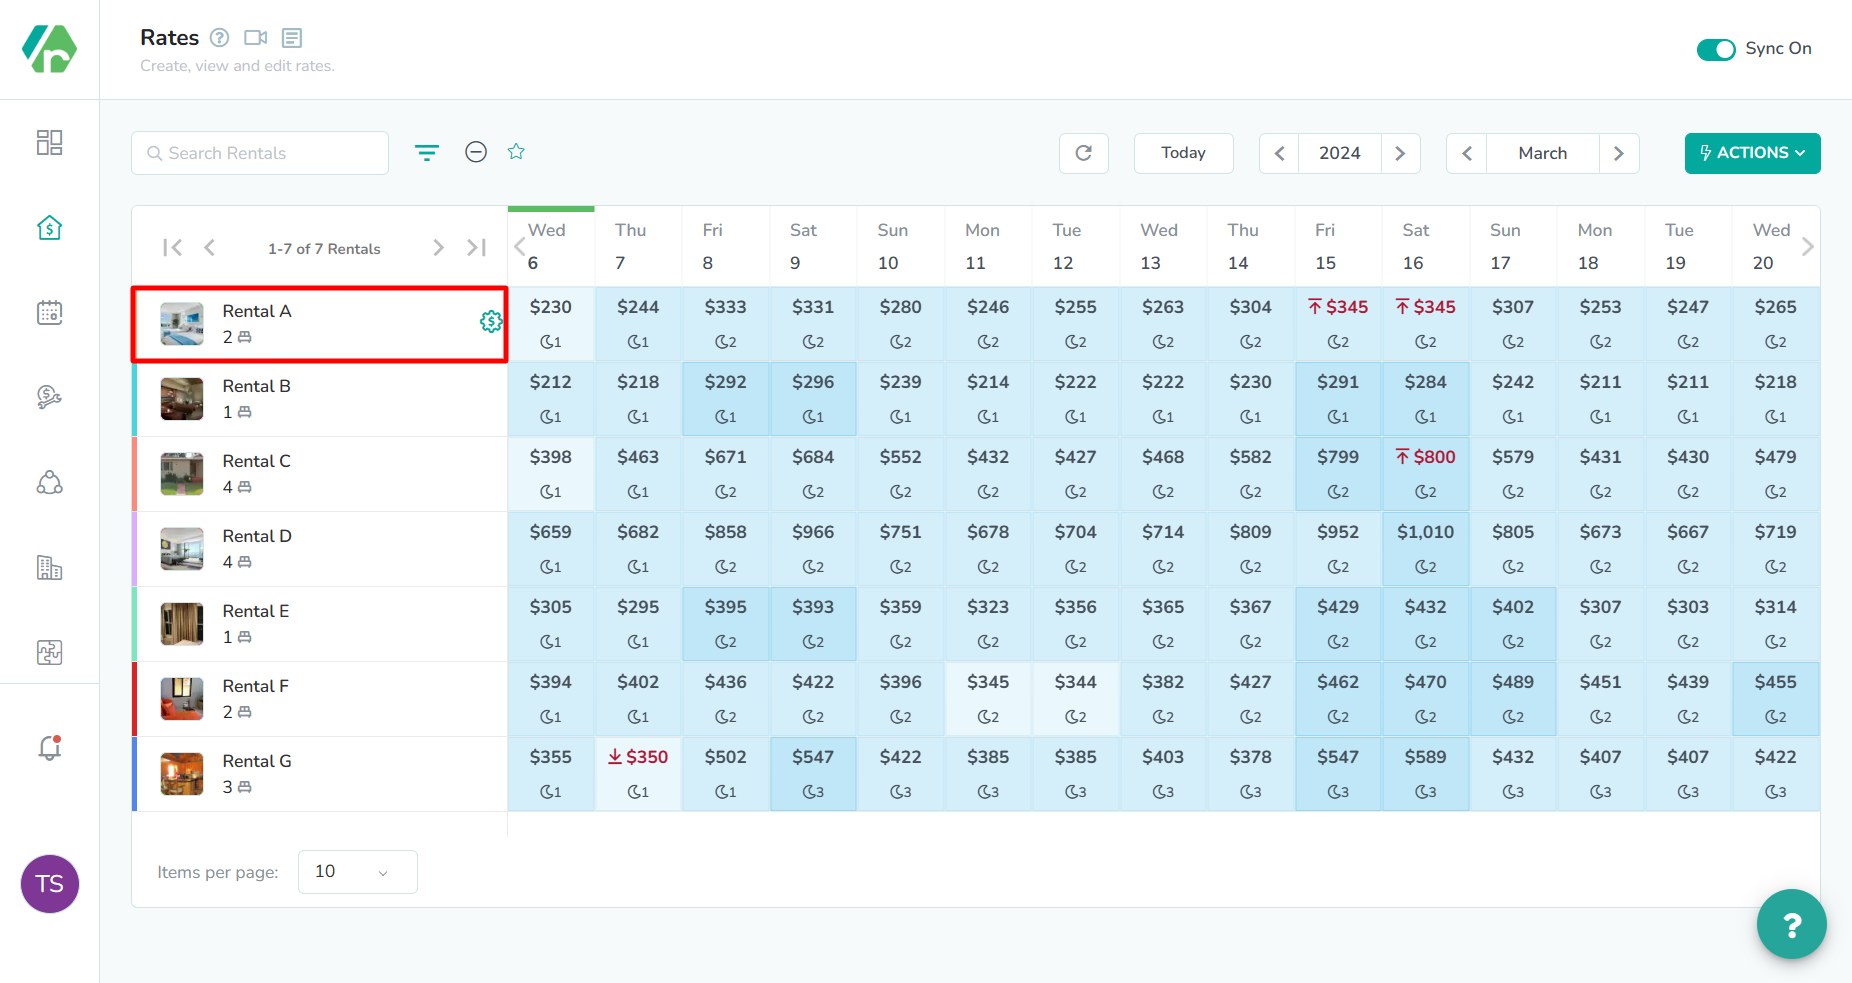
Click the rental name
The Rental is located in the left-most column of the rates calendar. Click here to open the rental rates overlay.
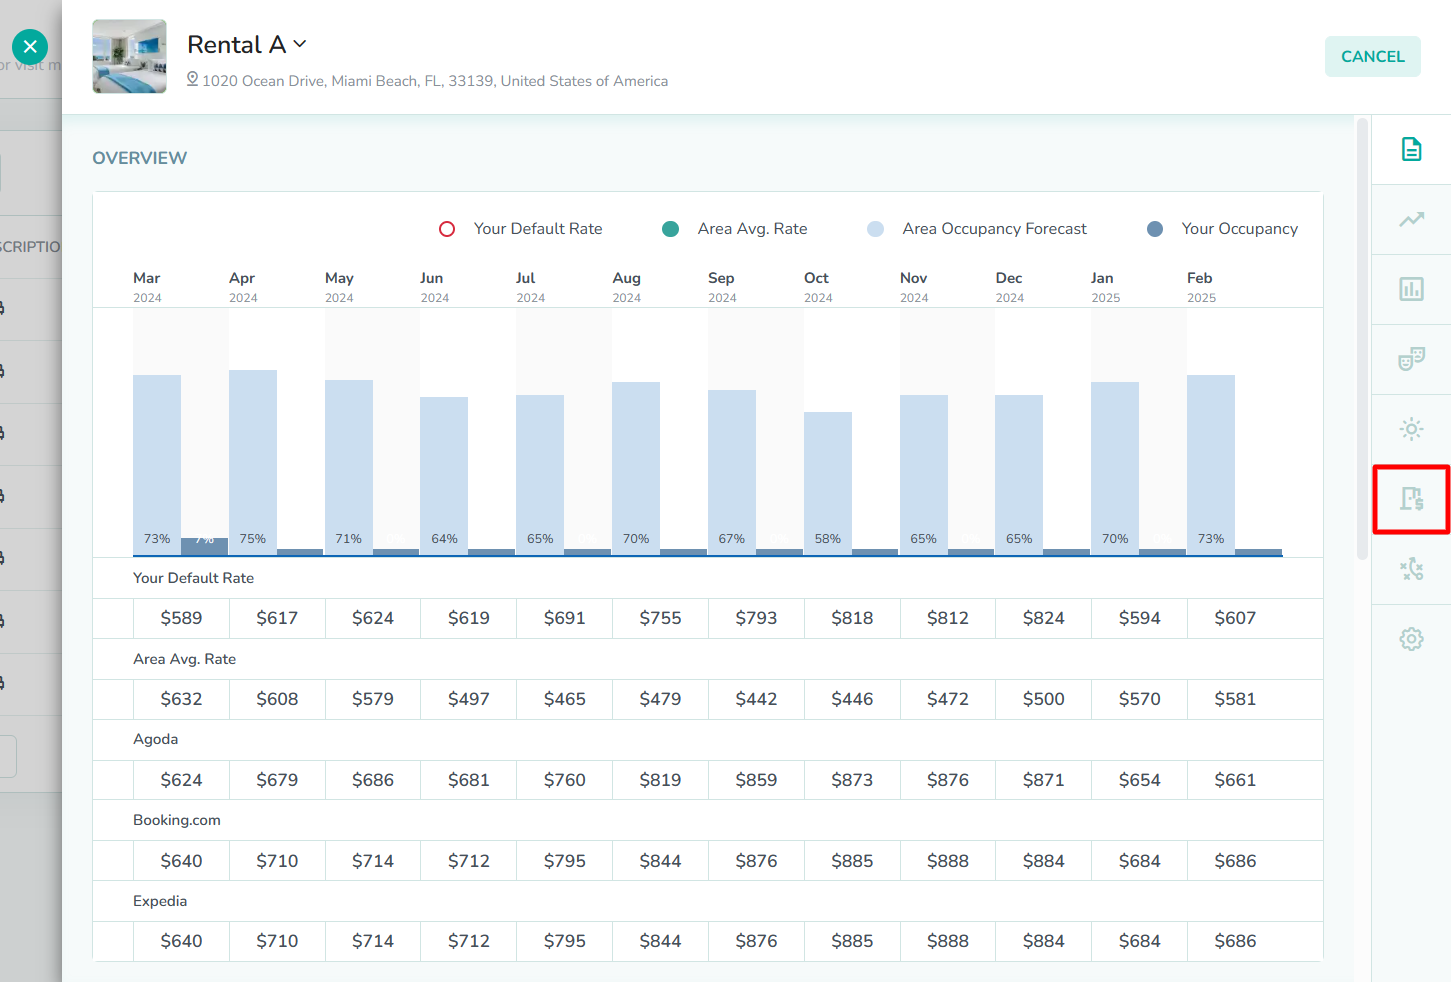
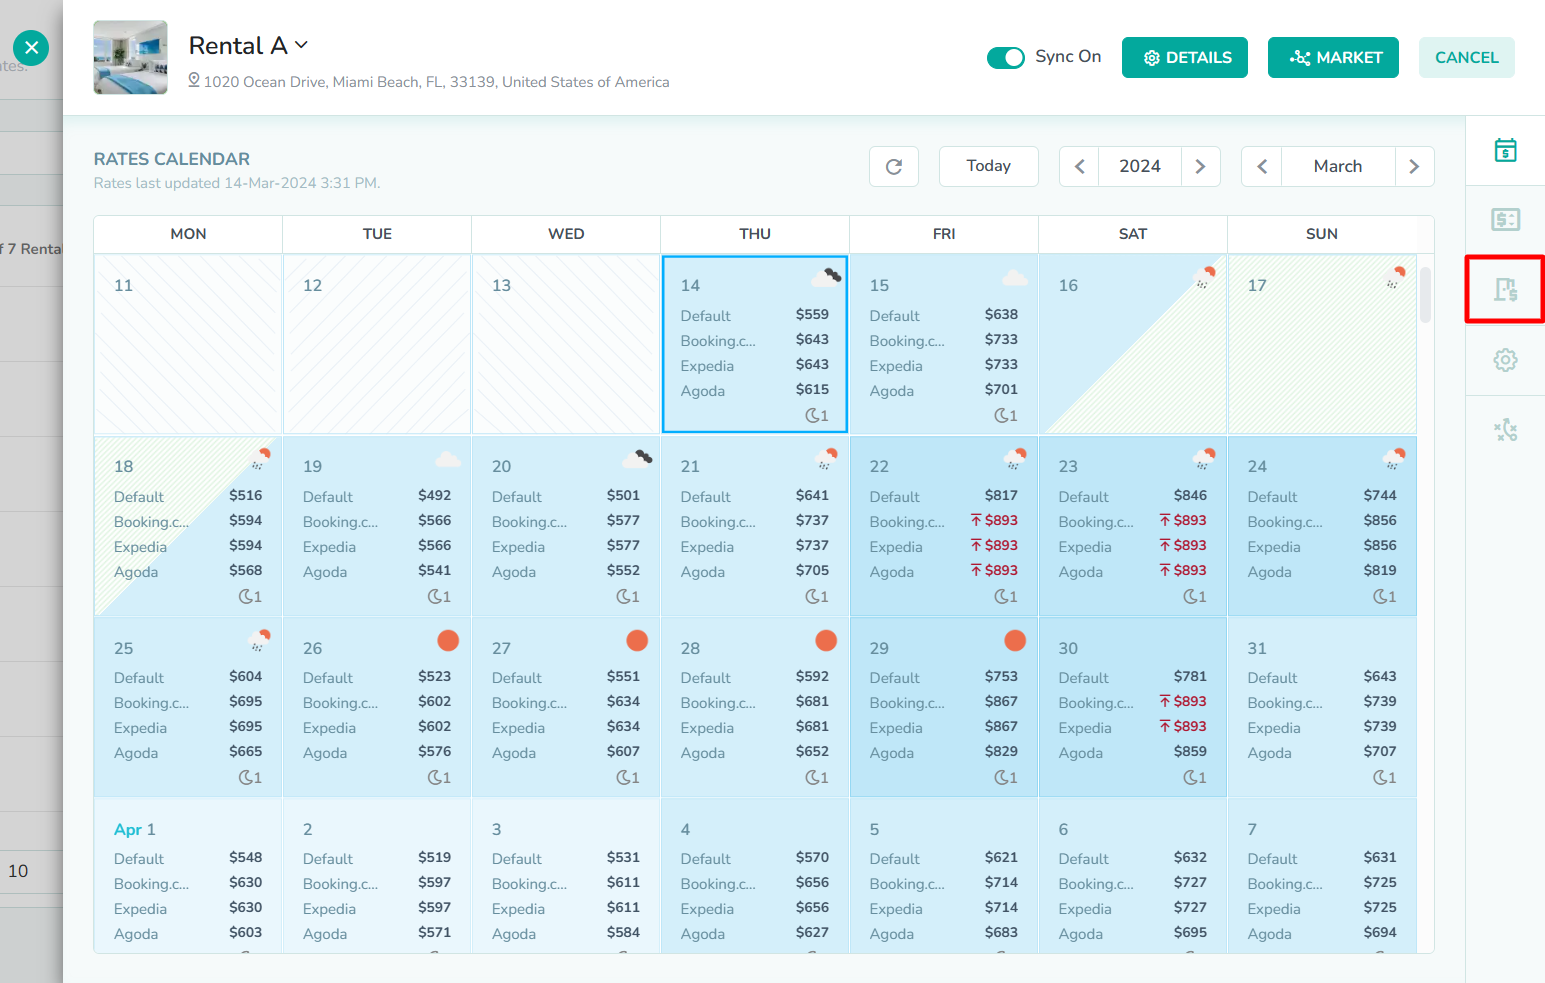
Click the Rate Mappings tab
The Rate Mappings tab is the third option in the right sidebar of the rental rates overlay. Click here to open the Rate Mappings tab.
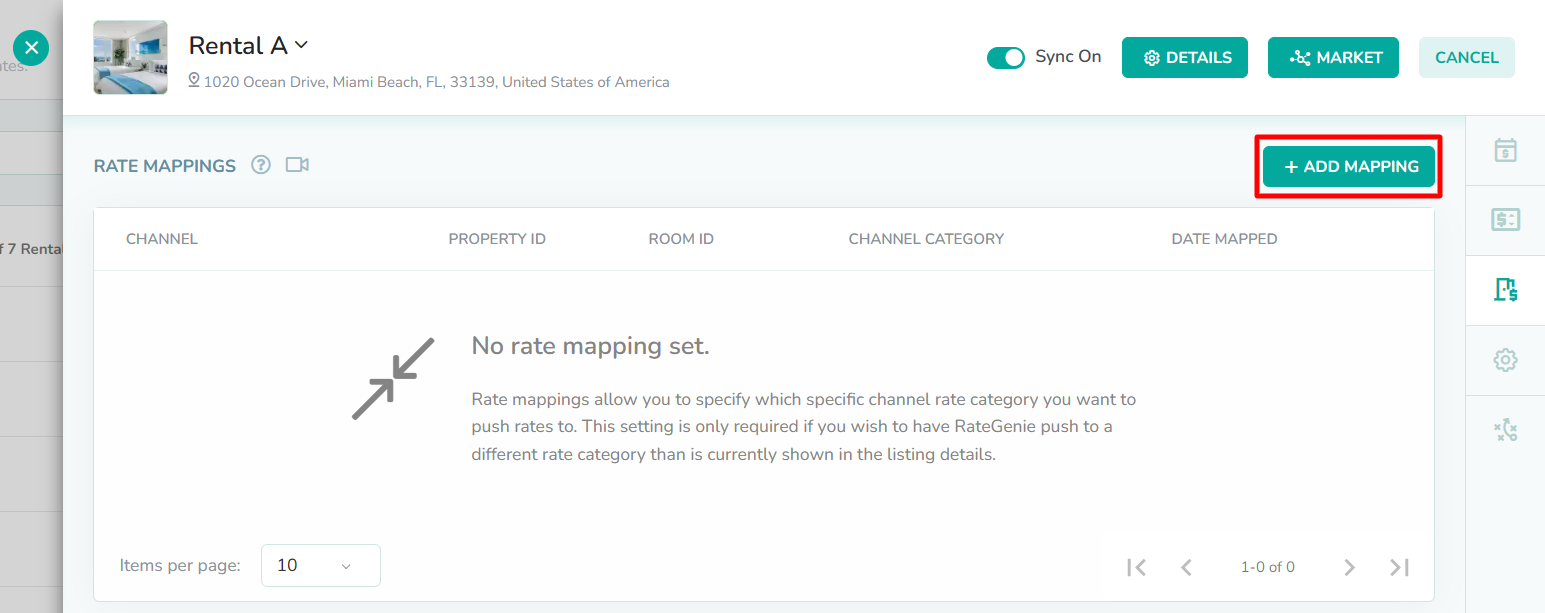
Click the Add Mapping button
The Add Mapping button is located in the top-right corner of the rate mappings table. Click here to open the Map Rate Category modal.
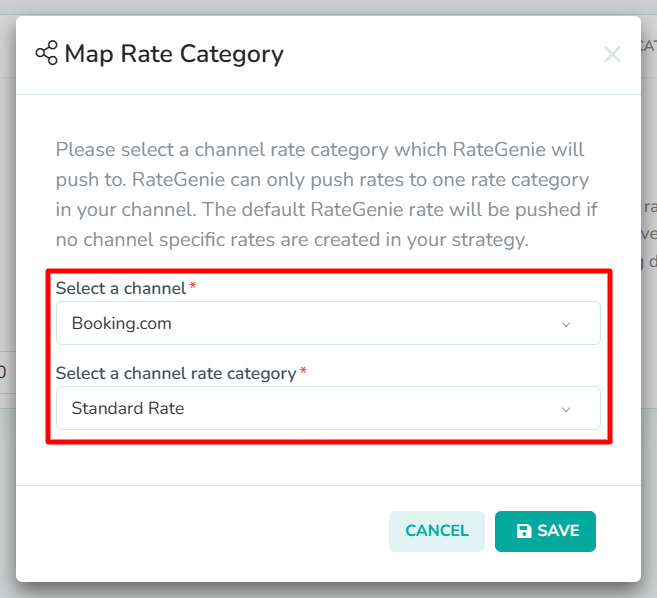
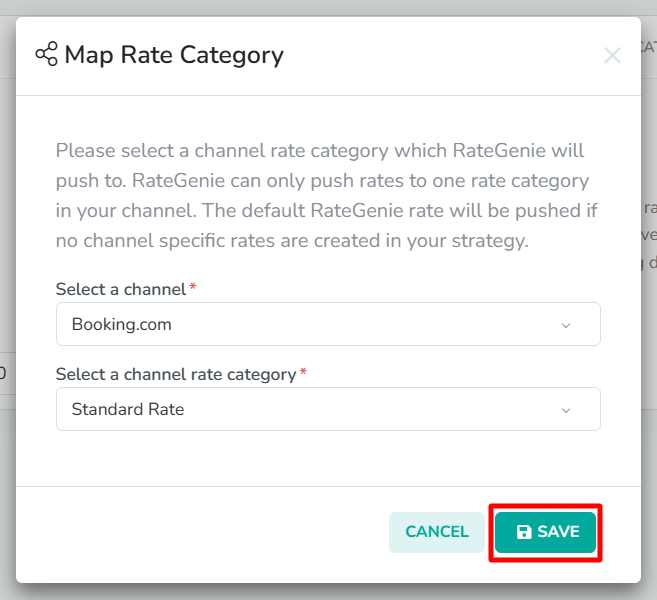
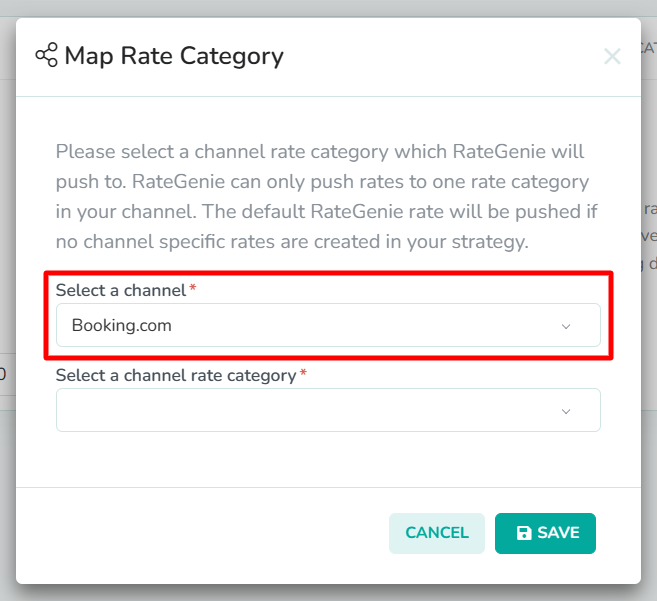
Select the channel
The Map Rate Category modal requires two fields to be completed. First, Select a channel that you want to push rates to in the channels selector.
In our example, we want to push rates to Booking.com. So, we have selected Booking.com from the dropdown list.
Select the channel rate category
Next, Select a channel rate category from the rate category selector that will act as the standard rate for your listing.The list of channel rate categories in the dropdown list will vary depending on which rate plans you currently have active in the channel listing.
In our example, we have already configured our Non-Refundable and Weekly rate categories to be based on the Standard Rate. They will each apply a 10% discount to the rates pushed to the Standard Rate category. So, we have selected Standard Rate from the dropdown list.
Click the Save button
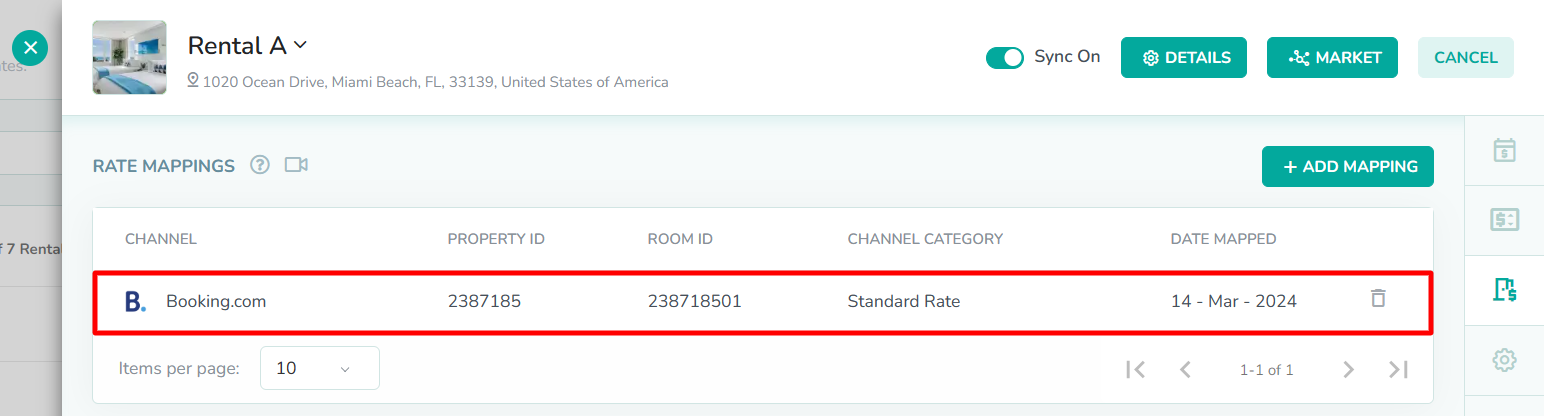
Lastly, click the Save button to create the rate mapping, and exit the modal. You will now see the new rate mapping displayed in the table.
In our example, we see the newly-created rate mapping is visible in the table.
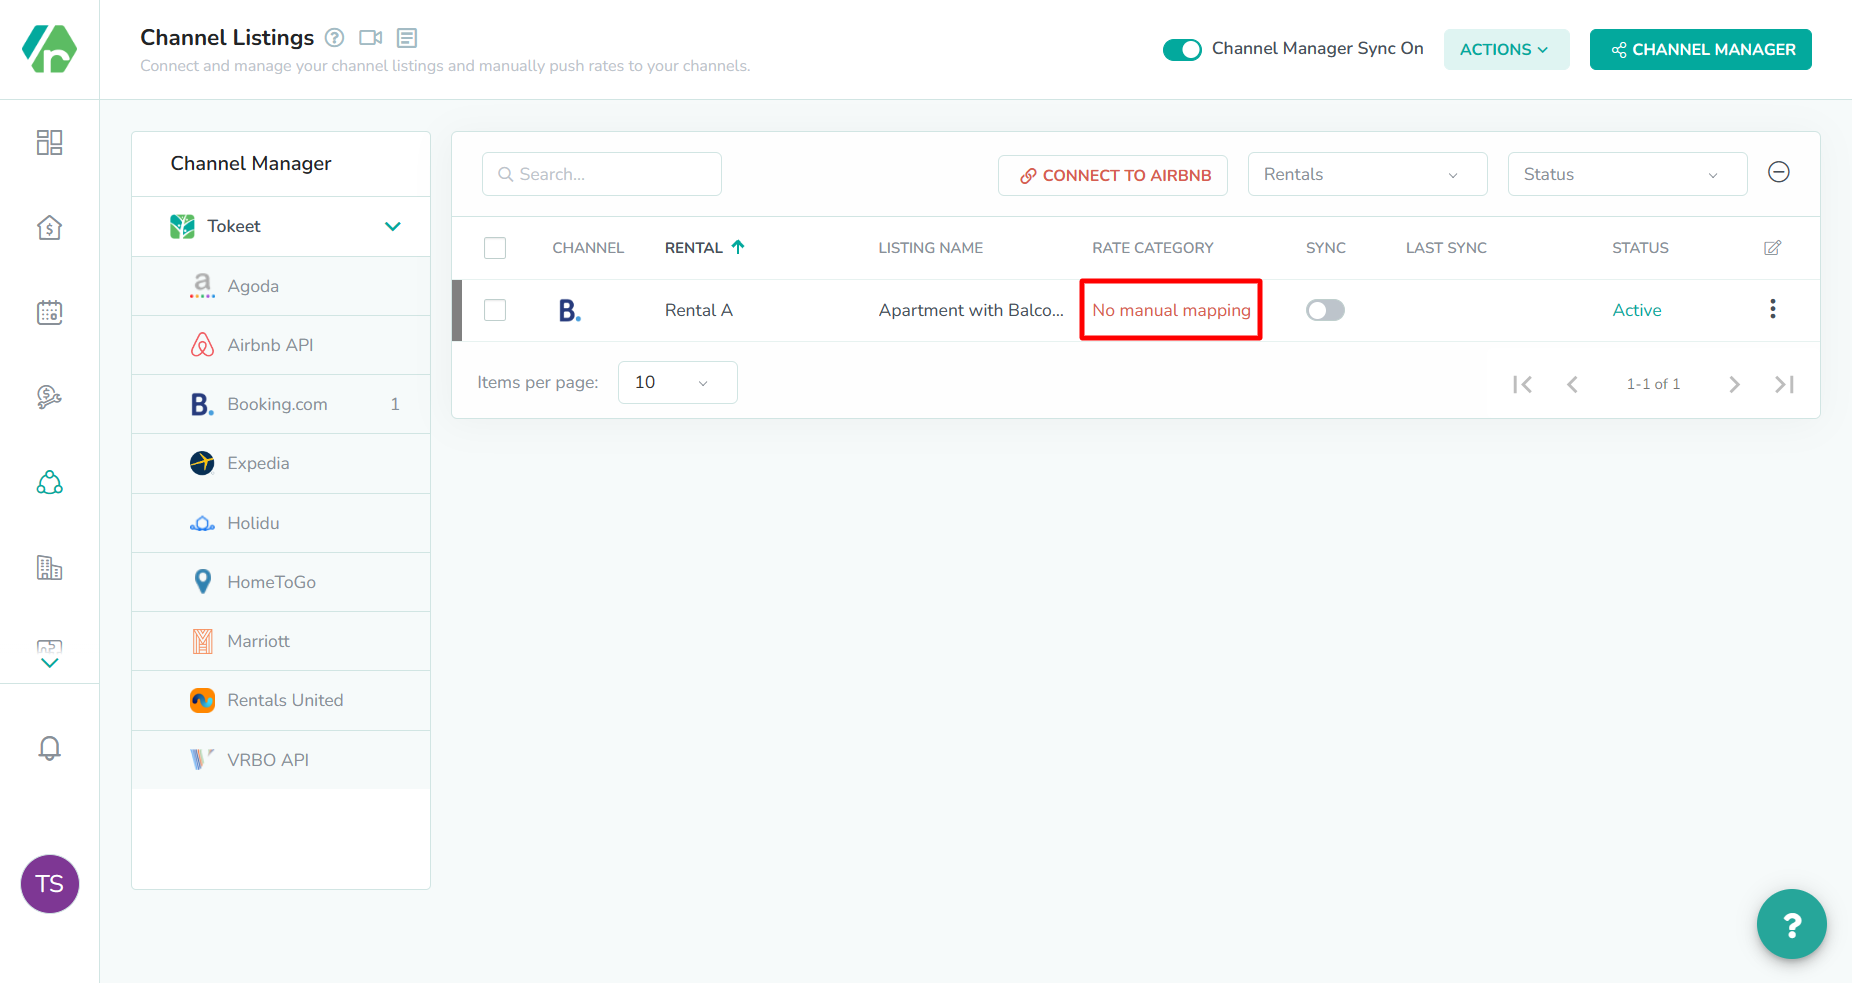
How to edit rate mappings on the listings page
Click on the rate category field
The rate mappings overlay can also be accessed from the Listings page. The rate category field is located in the listings table, marked by column Rate Category. First, click here to open the Rate Mappings overlay.
Edit the map rate category settings
Next, enter new values into the fields, or update the existing values by repeating Step 3 through Step 6 from earlier in this guide.
Click the Save button
Lastly, click the Save button to create the rate mapping, and exit the modal. You will now see the new rate mapping displayed in the table.
How to edit rate mappings on the rentals page
Click the rental name
The rate mappings overlay can also be accessed from the Listings page. The Rental is located in the left-most column of the rentals table. First, click here to open the rental market overlay.
Click the Rate Mappings tab
The Rate Mappings tab is the sixth option in the right sidebar of the rental market overlay. Click here to open the Rate Mappings tab.
Edit the map rate category settings
Next, enter new values into the fields, or update the existing values by repeating Step 3 through Step 6 from earlier in this guide.
Click the Save button
Lastly, click the Save button to create the rate mapping, and exit the modal. You will now see the new rate mapping displayed in the table.
As always, please contact us with questions any time. We're happy to help.

 In our example, we want to push rates to Booking.com. So, we have selected Booking.com from the dropdown list.
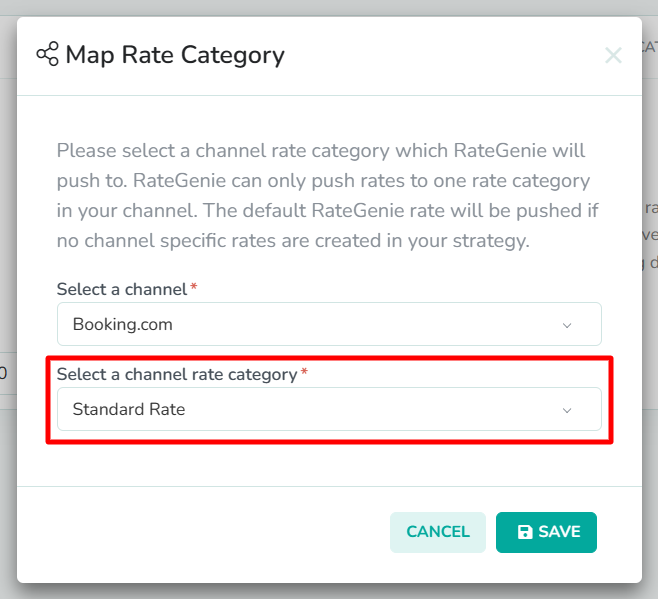
 In our example, we have already configured our Non-Refundable and Weekly rate categories to be based on the Standard Rate. They will each apply a 10% discount to the rates pushed to the Standard Rate category. So, we have selected Standard Rate from the dropdown list.
 In our example, we see the newly-created rate mapping is visible in the table.